
Composr Supplementary: Using Chrome development tools to help with themeing
Written by Raji (ocProducts)
Web browsers often have integrated web development tools that are very useful for debugging and testing web designs, as well as additional third-party extensions that may be installed. These browser tools vary with the jobs that they perform: some of them helps us to diagnose issues with CSS, HTML and JavaScript, while others evaluate the accessibility of our website. The most popular browsers such as Firefox, Internet Explorer, Google Chrome come with excellent tools.This tutorial will focus on Google Chrome which has (arguably) the best tools of any web browser. Most other browsers have similar features, but not quite as refined or powerful.
Chrome has an inspect element option in the browser tool to test live CSS changes and code changes, which is perhaps the most useful of all the tools. We can (also) use the tools for efficiently tracking down layout issues, setting JavaScript breakpoints, and getting insights for code optimisation.
Accessing the Chrome development tools
To access the tools either right-click on the web page and select 'Inspect Element' option or select the Chrome menu and go to View → Developer → Developer Tools. The apparent developer window will have the following tabs: Element, Resources, Network, Sources, Timeline, Profiles, Audit, and Console. This tutorial will describe the most important features of each of the tabs.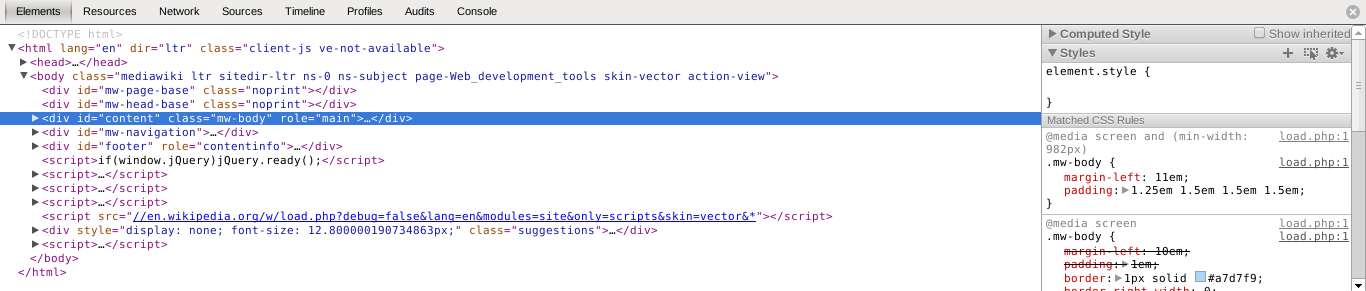
Elements
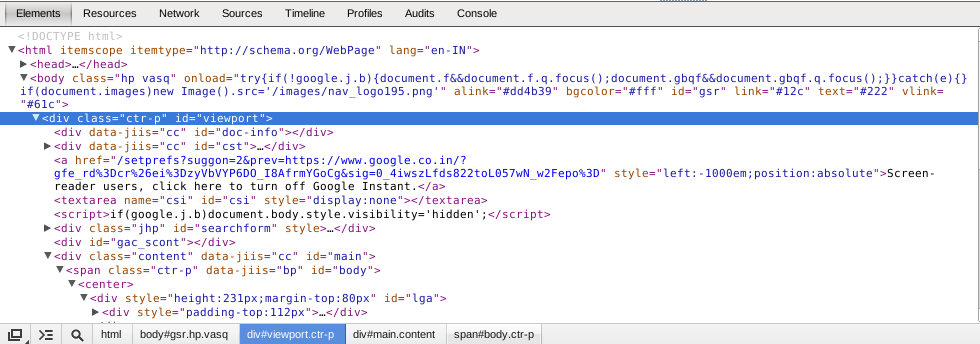
The first tab in the tools is Elements. This is the window that presents the web page as the browser sees it. It is similar to the traditional browser 'view source' feature, but will use the document structure to display the page elements attractively. Thus in this tab we can easily view the HTML elements, their ancestry and their descendants. The tab also allows you to browse, interact, and sometimes even change the Styles, Metrics, Properties, and Event Listeners for any element on the page.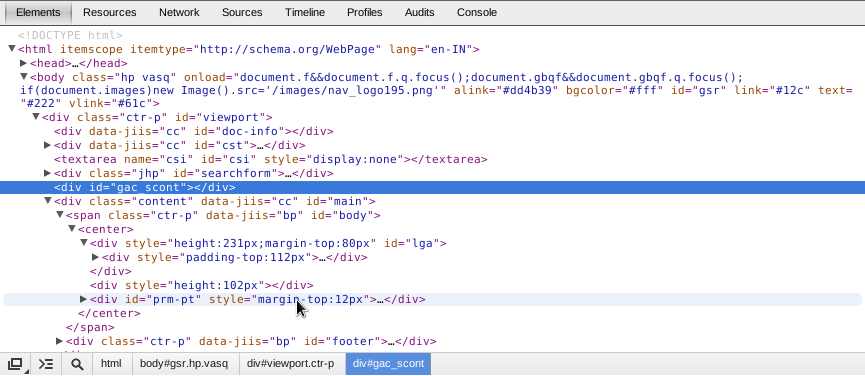
The tab shows page content in one DOM tree, and allows inspection and the on-the-fly editing of any DOM element. The DOM tree is the "Document Object Model" tree that is just the representation of the page elements as objects. The DOM nodes represents individual HTML elements, such as <body> and <p>. For ease of reading, the DOM tree view displays the HTML element tags instead of the DOM node types: for example, <p> instead of HTMLParagraphElement.
We can navigate through the DOM structure using either keyboard or mouse. By clicking on the node tags we can either expand or collapse. Expanding a node automatically selects its first child, so we can expand a deeply-nested structure by pressing the right arrow, that is with the element tag, repeatedly. Thus we can check different elements of the page and their properties, and can also do the live editing of CSS.
We can see a section at the right side of the tools with the style information of the selected element. Subsections of this include:
- Computed style
- Styles
- Metrics
- Properties
- DOM Breakpoints
- Event Listeners
As we navigate through the element we can see a line of breadcrumbs in the bottom bar and navigating down the structure will extends this line of breadcrumb. The tools displays as many items as possible in the trail. If the entire trail doesn't fit in the status bar, an ellipsis (…) shows where the trail has been truncated. By clicking the ellipsis we can see the hidden elements. The currently selected node in the tree will be highlighted in blue.
The tab also lets us modify the DOM:
- Edit a DOM node as HTML.
- Add and remove individual DOM nodes.
- Add, edit, and remove, attribute names and values.
- Move DOM elements.
(It is important to understand none of these changes save to the server, we are simply playing with what is being shown in the web browser right now.)
In DOM tree the elements and its attributes are editable. The fields can make editable just by double clicking on its tag name and can be renamed, the closing tag will be automatically became updated after renaming. We can rearrange the DOM tree to test out different arrangements for the page. We just need to drag a node within the tab to move it to a new position in the DOM tree. The DOM nodes can also be deleted by either of two ways:
- Right-click on the node and select "Delete Node".
- Select the node and press the Delete key.
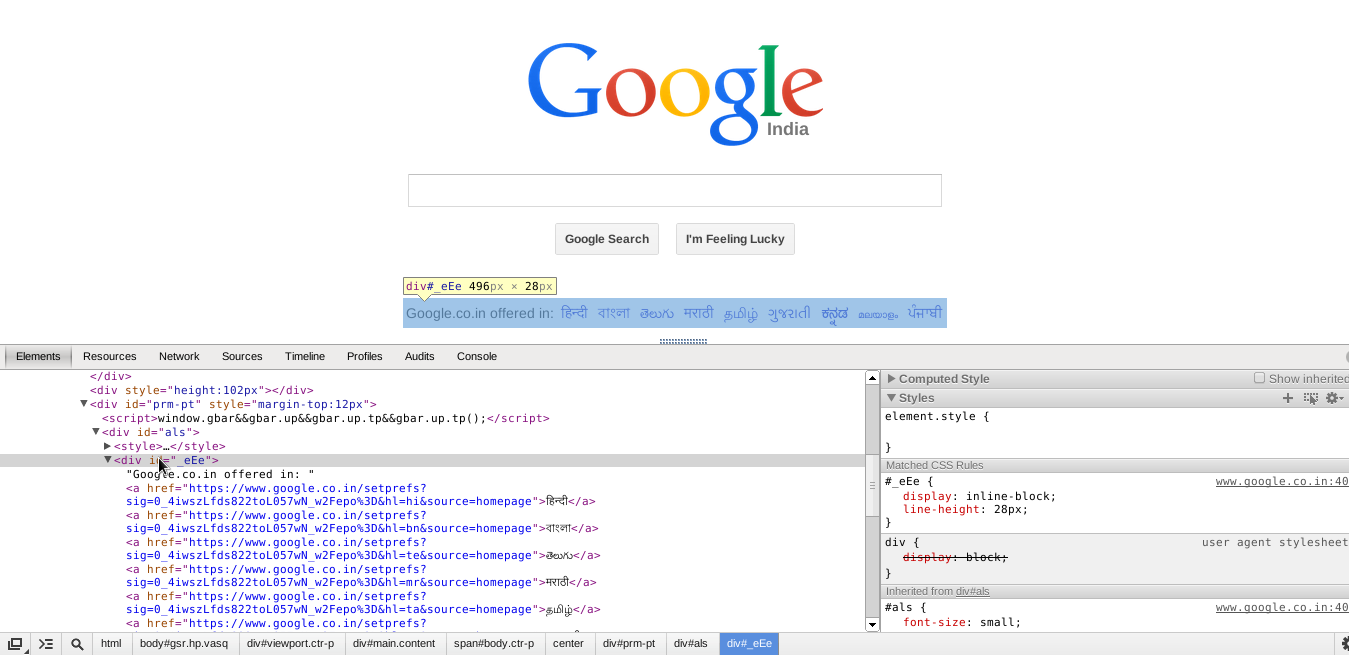
When we hover over or select a DOM node, the rendered element is highlighted in the main browser window. If the element is scrolled off screen, a tooltip is displayed at the edge of the browser window indicating that the selected element is off-screen. To scroll the page so the element appears in the viewport, right-click the element and select "Scroll into View".
Styles
The CSS of the page defines its appearance: that is the positioning and alignment of elements within the page. We can view and modify the CSS declarations that affect an element on the page. Clicking on any element in the elements tab will display all the styles attached to that element in the Styles pane as shown below.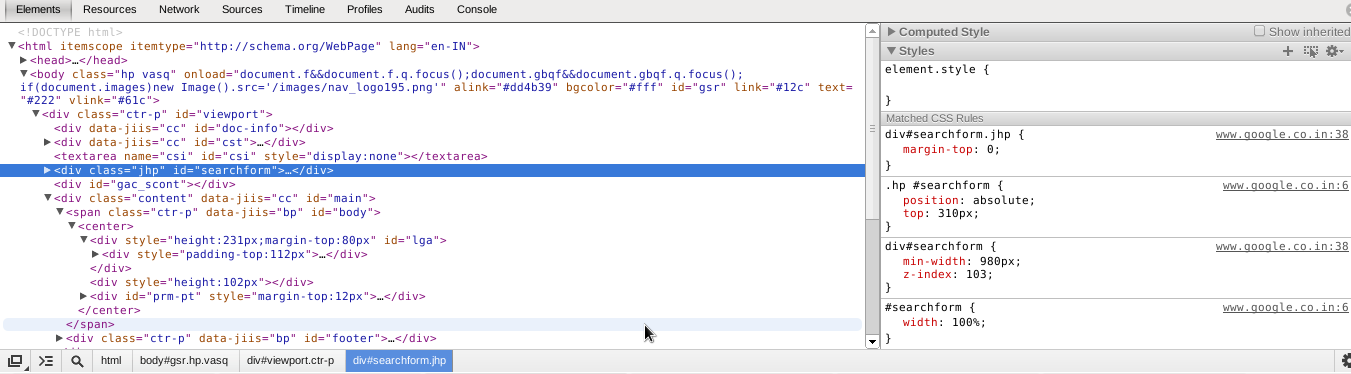
The Styles pane on the right shows the CSS rules that apply to the selected element, from highest priority to lowest, commonly:
- Element styles applied directly to the element using the style attribute (or applied manually already in the development tools).
- Matched CSS rules include any rules matched by the element. For example, the CSS selector span matches an HTML <span> element. This includes rules matched by class and ID also.
- Inherited styles include any inheritable style rules that match the selected element's ancestors.
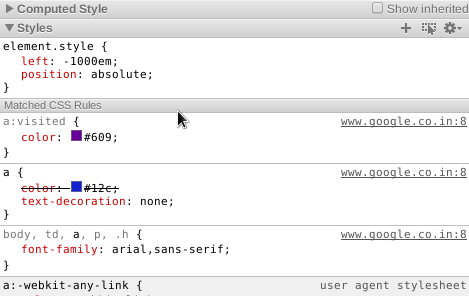
The styles applied to the page element can be modified and you can also then view the corresponding changes in the page immediately. The property and the value both are editable by clicking on them correspondingly. To create a new style we need to click an empty space within the editable CSS rule. Edit mode now applies to the CSS property field, we can now enter a new property.
This is incredibly useful for testing out CSS changes.
To add a new property and view code hints in the CSS property field, follow these steps:
- Begin typing into the CSS property field. Suggestions display in a drop down box.
- Press Up or Down arrows to focus on a suggestion.
- Accept a suggestion using Tab, Right arrow, or Enter.
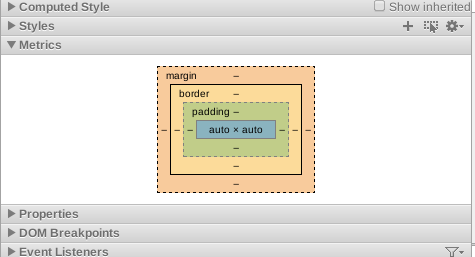
The Metrics option at the styles pane will show a rectangular representation of each sections of an element such as margin, border, padding etc as shown below. The inner, content box shows the dimensions of the content area. Outer boxes, such as the border box, show the values for each of the edges: border-top, border-right, border-bottom, and border-left.
Resources
The Resources tab shows the communication between the web server and client browser. Here we can see all of the resources requested by the browser, the time taken to receive them from the browser, and the bandwidth used during the transfer. For accessing this functionality we will need to enable it for the page that we are viewing because running the resource tab affects the page performance it is disabled by default. The resources tab lets us examine the resources loaded in to the active page. It also lets us to interact with HTML5 Database, Local Storage, Cookies, etc, as shown in the screenshot below.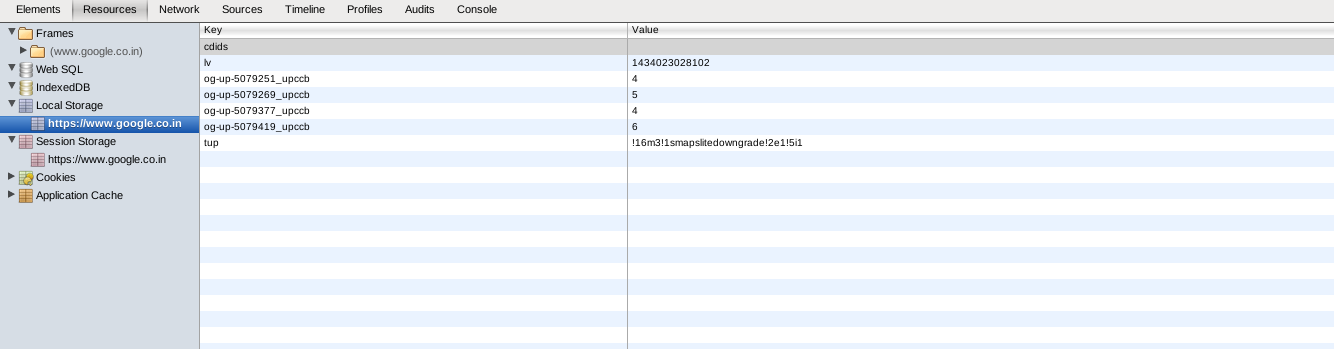
You may want to load the Composr page with &keep_no_minify=1/?keep_no_minify=1 so that the CSS and JavaScript resources show more clearly.
Network
The Network tab provides the information about the resources that are requested and downloaded over the network in real-time. As with the Resources tab, the Network tab needs enabling first. For optimising our page we need to identify those requests that are taking longer time than expected or are superfluous.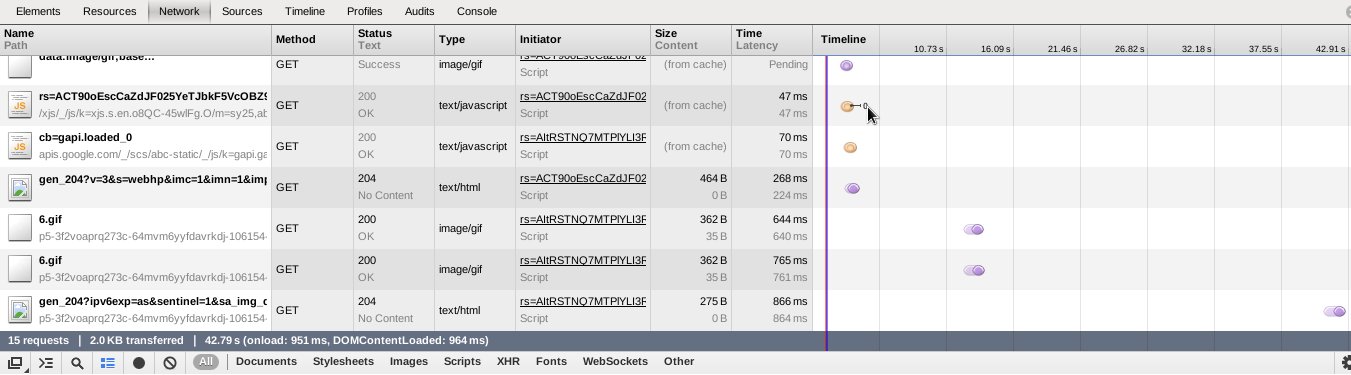
Sources
The Sources tab lets us view all the loaded JavaScript source code.
A debugger is provided. We can set breakpoints in the JavaScript code so that we can analyse what is happening when it runs.
Console
The Console tab is a place to:- Log diagnostic information in the development process (via the console.log() function).
- View errors and warnings.
- A shell prompt which can be used to interact with the document and the development tools (we can enter arbitrary JavaScript and thus interact with our page).
Audit (advanced)
The Audit tab help us to perform the optimisation of the application. This tool can analyse a page as it loads and provide suggestions and optimisations for decreasing page load time and increase perceived (and real) responsiveness.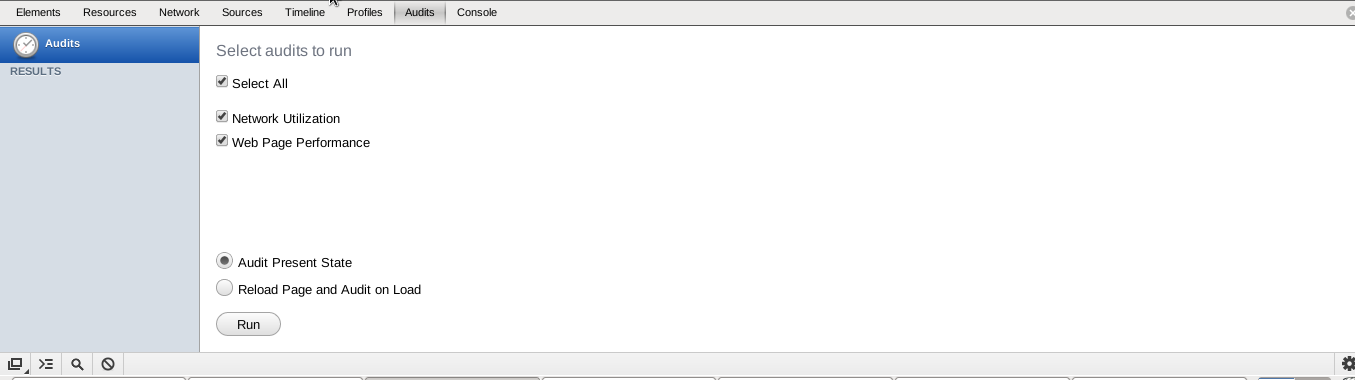
Profiles (advanced)
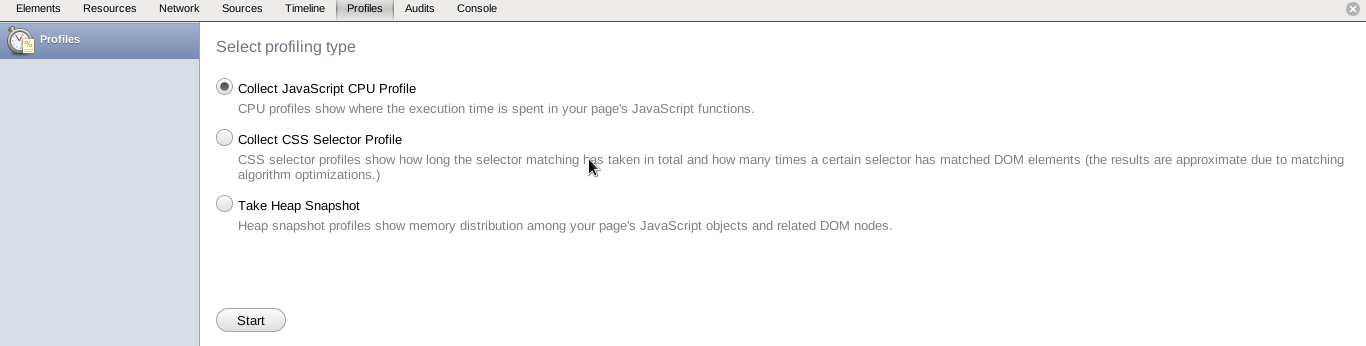
The Profiles tab helps us to capture and analyse the performance of JavaScript scripts of a page. For example, we can learn which functions take the most time to execute and zero in on exactly where to optimise. There we can select any type of profiling from the three options that are provided. The profiling options are:- Collect JavaScript CPU Profile: CPU profile shows where the execution time spent in our page's JavaScript functions.
- Collect CSS selector profile: CSS selector profile shows how long the selector matching has taken in total and how many times a certain selector has matched DOM elements.
- Take Heap snapshot: Heap snapshot profiles shows memory distribution among our page's JavaScript objects and related DOM nodes.
Timeline (advanced)
The Timeline tab gives us a complete overview of where time is spent when loading and using our page. All events, from loading resources, to parsing JavaScript, calculating styles, and repainting, are plotted on a timeline.See also
- Themeing your site
- Guide to web technologies (including HTML, CSS, and JavaScript)
- Browser version requirements
- Making a new theme
Feedback
Please rate this tutorial:

Have a suggestion? Report an issue on the tracker.