
Composr Supplementary: Set Up a Workflow in Composr
Written by Steve Jarvis, Sponsored by Arvixe hosting
For larger enterprises and companies the ability to have multiple levels of sign off for website content can be important. The Composr workflow addon handles this, although currently by default the addon only affects galleries (extensions can be made by a programmer to allow it to be used for all content types).The workflow addon for Composr extends the standard yes/no validation system which is included in Composr as standard. This is incredibly useful if you need to have different heads of department sign off different elements of content. If you just need the content to be signed off by one of a group of people than the normal validation system will work for you.
A workflow contains an ordered list of 'approval levels', such as 'design' or 'spelling', and each of these has a list of usergroups which have permission to approve it. The workflow system allows you to sign off your section and pass the content along to the next group which requires sign off. You can reject the content and require it to be edited by the original submitter.
New content will enter the workflow unless otherwise specified and will pass along the chain until it is fully signed off by all levels.
How to set up the workflow in Composr
Setting approvals on the workflow's level 1
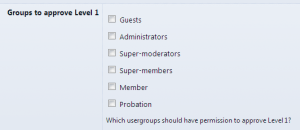
(Click to enlarge)
Adding a new workflow

(Click to enlarge)
The workflows addon

(Click to enlarge)
To install the Workflows addon:
- Go to the Admin Zone
- Navigate to the Structure section of the Admin Zone menu
- Choose the Addons icon
- Scroll down and choose "Import non-bundled addon(s)"
- Click Download and choose the New Features category
- Choose Workflow
- Scroll down and click the "Import non-bundled addon(s)" button
- Check the list of files to make sure it will not overwrite any of the files you have manually edited
- Click Proceed when you are happy
Workflows should now be installed but will need to be configured. To do this you will need to go to Admin Zone > Content > Workflows, which will allow you to either define a new workflow or edit an existing workflow.
On the next screen you can set which of your usergroups can authorise each of the different levels which you have created. You will probably want to make sure your admins group can authorise all of the levels. You can create as many different levels as you require.
Feedback
Please rate this tutorial:
Have a suggestion? Report an issue on the tracker.