
Composr Supplementary: Composr Custom Profile Fields (CPF)
Written by Jim Davidson, Sponsored by Arvixe hosting
What are CPFs and why would you use them?
Composr CPF's are a powerful way to collect member information, you can create extremely complex signup forms but for now we will concentrate on some simple additions by creating form fields that allow the user to enter simple text, select an option from a dropdown list and make a selection from radio buttons.Lets imagine we are going to create a Composr forum for dog lovers, typical information we might want to collect could be,
- Location
- Dogs name
- Dogs breed
- Dogs age
- Dogs Gender
Everything we do will be in Admin Zone > Tools > Members > Custom profile fields.
Add a custom profile field
We will edit an existing Custom profile field (Location) and create new ones for the dogs name, breed, age and gender. Existing CPFs can be edited or deleted and new fields added easily.
Location
Click “Edit Custom Profile Field”. There are a number of default fields that we can use but for now just click the edit link for “Location”.Edit the location field

The form fields
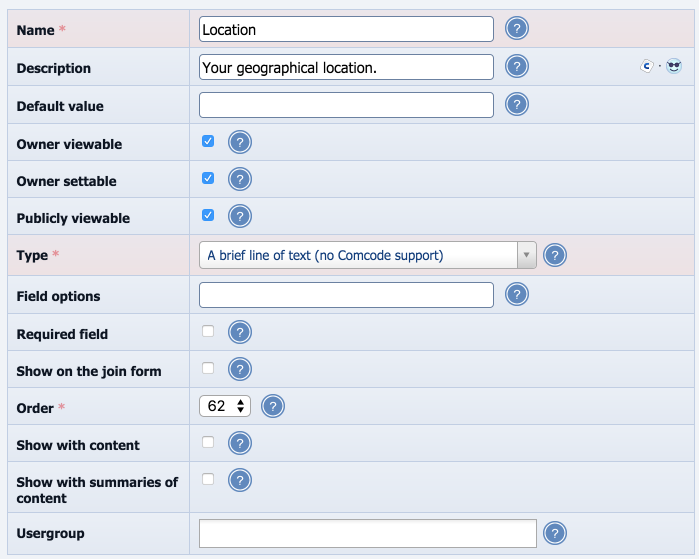
We simply want to collect “Location” data so we can leave the “Type” as “A brief line of text (no Comcode support)” After all, a location is a simple line of text.
By far the best time to collect data is when the member joins your community so it's a good idea to check Show on the join form, it's also most likely that you want to collect this information so go ahead and check the Required Field checkbox too.
Scroll to the bottom of the page and click to save.
Dogs Name
In this instance, we need to Add a Custom Profile Field.Add custom profile field icon

Give your new CPF a name – “Dogs Name” – and a description “What is the name of your dog?”
Add name and description to CPF

Default value can be left blank.
Once again the type of information we want to collect is a simple string of text so the default type will suffice.
What type of information to collect

Make sure you check required field and show on the join form.
Scroll to the bottom of the form and click Add Custom Profile Field.
Dog Breed
The information we want to collect here is of a slightly different type. We know the different breeds of dogs, so we can create a list for the member to select from and it's really easy to do.Click to Add a Custom Profile Field and give it a Name – “Dog Breed ” – and a Description – “What breed is your dog?”
Add a new custom profile field

From the “Type” dropdown list there are lots of options but we want to select “A value chosen from a list”.
Set as value choosen from a list

Create the list of choices
The “Default value” field is where we create our list of choices. Each choice is separated by a pipe (|) character which is usually found on the backslash key on your keyboard simple hit shift and the pipe/backslash keys together.Create a list of choices for your custom profile field

Make sure you check the “Required field” and “Show on join form” checkboxes.
Required field and show on join form

Scroll to the bottom of the page and click "Add Custom Profile Field".
Dogs age
We want to collect the dogs age so go ahead and click “Add Custom Profile Field”.Give it a Name – “Dogs age” and a description – “How old is your dog?”
The default value.
Like before, we want to create a list of options so enter the numbers 1-15 separated by a pipe.
1|2|3|4|5|6|8|9|10|11|12|13|14|15
For “Type” select “A Value chosen from a list”.
Make sure you check the “Required field” and “Show on join form” checkboxes.
Default values to your custom profile field
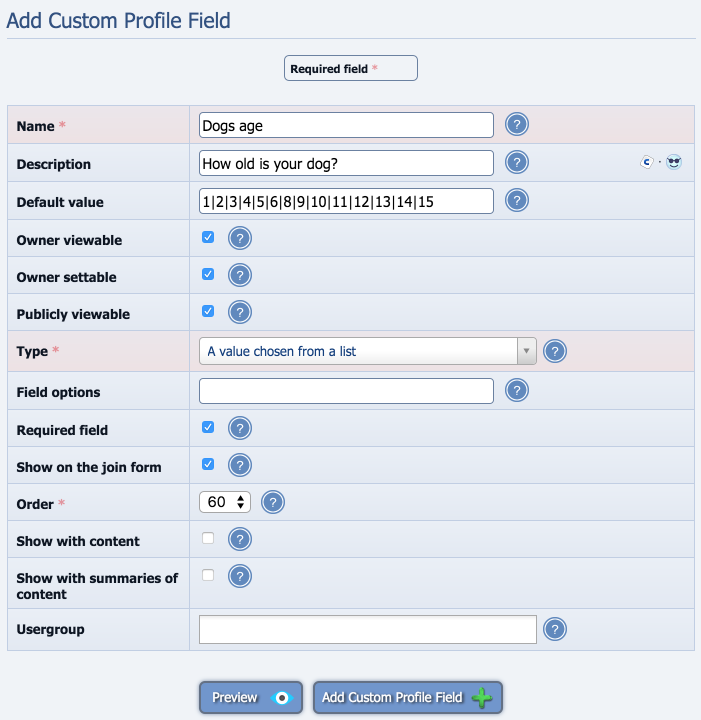
Scroll to the bottom of the page and click Add Custom Profile Field.
Gender
Finally we can create our Custom profile field for the gender of the dog.Click “Add a Custom Profile Field”
Give it a “Name” – “Dogs gender” and a description – “What sex is your dog?”
Let's use radio buttons in our joining form. For “Type” select “A value chosen from a list” and set the Field options to “widget=radio”.
In the “Default value” type our options Male|Female|Other. Don't forget to use the pipe separator.
Make sure you check the “Required field” and “Show on join form” checkboxes.
Use radio buttons on your custom profile fields
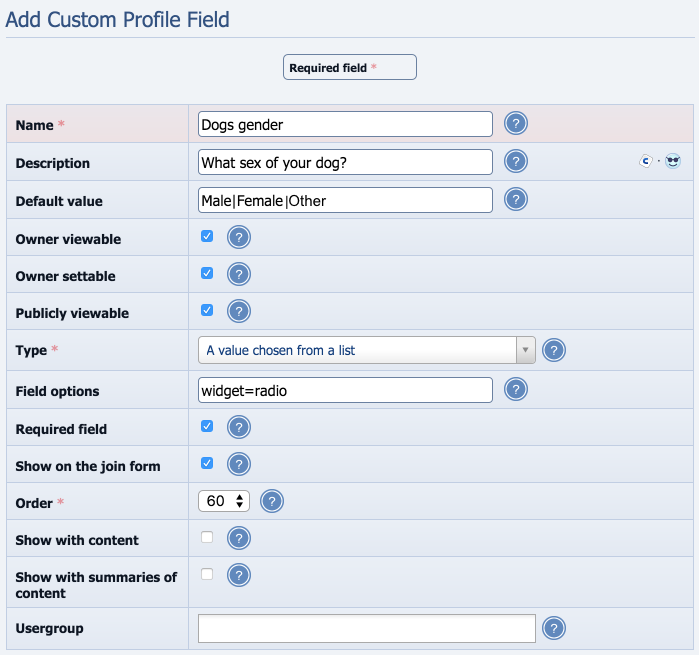
Scroll to the bottom of the page and click Add Custom Profile Field.
As you can see from the screenshot, Composr allows you to quickly create complex forms that force users to enter information thus creating a stronger community.
View the finished signup form

Additionally, you can stipulate who will see the member information.
Owner viewable
Whether a member may see their own value for this field.Owner settable
Whether the target member may set the value of this field; if a field is required, then the member sets it during joining, irrespective of this.Publicly viewable
Whether anyone may see the contents of this field.Choose where to show the information
Show with content
Whether the value of this field will be shown with member content (currently next to posts on the forum, and also from within personal-galleries).Show with summaries of content
Whether the value of this field will be shown with certain kinds of member content summary (currently just personal-gallery links in the galleries module).Usergroup
Only use this field for these member usergroups.Finally you can set the order in which this field's name and corresponding value are placed when an entry is viewed. The initial position is set by Composr, the default setting is sequential meaning that the value/s will be shown in the order you added them but you may want to change it.
Hopefully now you can see how quickly you can create sign up forms with checkboxes, radio buttons and dropdown lists using the intuitive Composr interface?
Feedback
Please rate this tutorial:
Have a suggestion? Report an issue on the tracker.