
Composr Supplementary: Adding an Activity Feed to your Composr Website
Written by Steve Jarvis, Sponsored by Arvixe hosting
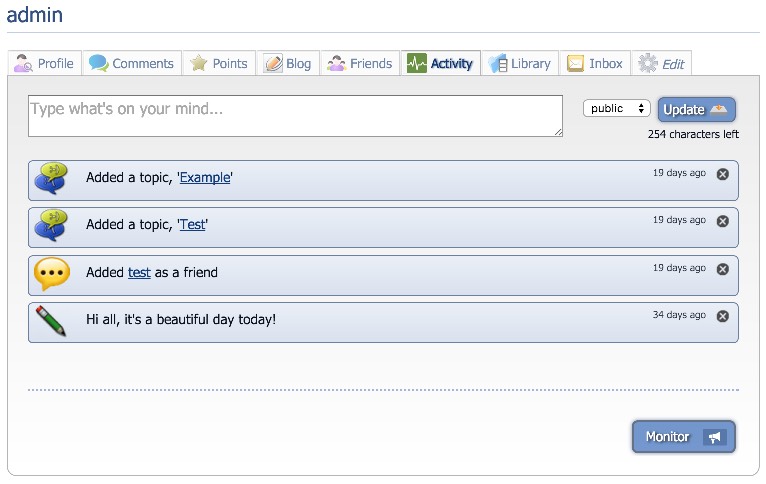
Activity feed
(Click to enlarge)
There are a range of core and additional features in Composr which social media users will be familiar with. This tutorial deals with the Composr Activity feed addon which will be very familiar to most users of popular social media sites.
The activity feed addon for Composr is designed for you to be able to display a list of all the activities which are happening on your site.
The addon comes as two main blocks. One of which displays the site activities (main_activities) and one which allows you to post new activities (main_activities_state). There are a number of configurable options for the main_activities block and it can be used to display a range of activities configured and limited to all activities or those from specific members. These blocks will be added to member profiles by default but can also be added to other pages.
If the chat feature is installed onto your site, “status" posts can be restricted to show only for friends.
If you have the Facebook or Twitter addons installed, then the system can syndicate out activities to the user's Twitter and Facebook followers too.
Installing the activity feed addon
Obviously the first thing you will need to do to utilise the Activity feed block is to install the addon. To do this:- Go to the Admin Zone
- Navigate to the Structure section of the Admin Zone menu
- Choose the Addons icon
- Scroll down and choose "Import non-bundled addon(s)"
- Click Download and choose the New Features category
- Choose Activity feed
- Scroll down and click the "Import non-bundled addon(s)" button
- The next screen shows all of the files which will be edited or installed. Check this list carefully if you have manually edited files to make sure nothing is being overwritten which will break your site. If you are happy you can click Proceed.
The two blocks are now added to the Block construction assistant.
Setting up the main activities block
The main_activities block in the Block construction assistant
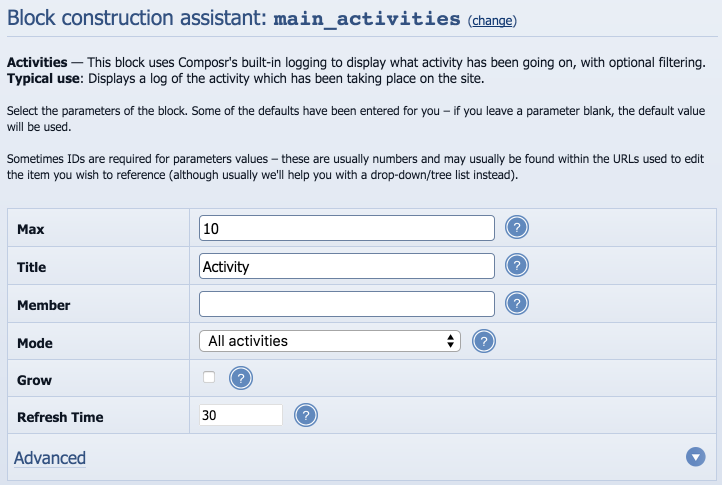
(Click to enlarge)
- Max – The maximum number of activities which will be displayed. This defaults to 10
- Param – This is the title of the block which you want to display on your site
- Member – Can be left blank but can be used to display activities only from certain members
- Mode – A choice of display types from all activities, only activities from some members stated above or activities from the stated members friends
- Grow – whether you want the list to grow and become longer as more activities are added
- Refresh time – How often you want to check for new activities. You may want to set this to longer if your server has usage limits.
Adding an update your status block to a Composr page
Doing a status update

(Click to enlarge)
That said, you probably won't want to bother as by default it already is added onto a tab in each member's own profile. That tab also shows activities for that particular member.
Manual Comcode
You can of course use the Block construction assistant but if you wish to add the block manually for any reason an example of the code can be found below:Code
[block="Activities" max="10" grow="0" mode="all"]main_activities[/block]
This will display a block with the title Activities and will contain the last 10 activities. Any old activities will fall off the bottom of the block once more are added beyond the original 10 (grow="0") and there is no filtering on what is shown. (mode="all").
Adding the Status update block to a page
To manually add the status update block you can use the following code or the Block construction assistantCode
[block="Update your status"]main_activities_state[/block]
This will add a status update block with the title "Update your status".
Feedback
Please rate this tutorial:
Have a suggestion? Report an issue on the tracker.