
Composr Tutorial: Basic Installation
Written by Allen Ellis (ocProducts)
Before you begin using Composr, you will need to install it. Installing Composr is easy with our installation utility, which will be explained in detail in this tutorial.Your options (preface)
Before we dive into instructions, we should lay out the different options you have for installation.Your options are:
- Install on traditional hosting (shared hosting/VPS)
- Use a supported integration. You can install with just a few clicks if your webhost has a supported integration such as Softaculous or Installatron installed. If this is the case then you don't need to read this tutorial.
- Use the quick installer. This tutorial covers this case.
- Use the manual installer. You are unlikely to need to use the manual installer. If you do, the Advanced Installation tutorial provides supplementary information to the installation fundamentals described in this tutorial.
- Get a professional developer to install for you.
- Install on dedicated server or cloud machine (IaaS). If a control panel is provided then installation may be identical to traditional hosting. Otherwise you will need to have a more advanced understanding of server management. Many details are described in the Advanced Installation and Webhosting for Composr tutorials.
- Install on a PaaS service. PaaS services are typically managed directly by programmers and specific instructions would vary greatly between service.
- Install on a Windows machine
- Use a WAMP system. Covered in the Installing Composr on a Windows desktop tutorial.
- Use Bitnami. Covered in the Installing Composr on a Windows desktop tutorial.
- Use Microsoft Web Platform. Covered in the Installing Composr on a Windows desktop tutorial.
Prerequisites
Before you install Composr:- Ensure that your host covers our minimum requirements.
- Consider getting a general knowledge of web applications. This is not required but it will give you some overall understanding of what kind of web systems there are and how they work.
- Make yourself familiar with the 'Webhosting control panel' your webhost has provided. Common ones include Plesk and cPanel. Your host may not name the control panel, but they will have provided you to the details to log in to it. You will typically use the control panel to set many things up, including: databases, possibly subdomains, possibly SFTP/FTP accounts, e-mail accounts.
- You also need the following information from your webhost:
- SFTP/FTP hostname
- SFTP/FTP username
- SFTP/FTP password
- You need to set up a database, and note down these details:
- MySQL hostname
- MySQL username
- MySQL password
- MySQL database name
Composr does not need its own database (i.e. it can share one), but if you are able to create a new one it is often preferable for reasons of tidiness. The database user needs full read/write/administer access over the database Composr will be installed in. Sometimes you set this access by ticking (checking) to have all permissions on your user. Sometimes you do it by setting the 'User role' to something such as 'dba' (e.g. h-sphere on Windows).
Specifically for MySQL the low-level permissions needed are:
- Read: SELECT
- Write: INSERT, UPDATE, DELETE
- Administer: CREATE, DROP, ALTER, INDEX
Similar products require the same information.
If you would like to use a 3rd party forum system for your website, we require that you install that before installing Composr. We recommend you use the inbuilt forum though (Conversr).
Deciding: Quick or manual install
At some point you'll need to decide which method you'd like to use to install Composr. You have two options, the quick installer, or the manual installer.We highly recommend choosing the quick installer. This is a simple process, where you upload two files to your web server, then launch our installation utility from there. It works on most servers.
The second option is the manual installer. This option requires you to manually upload all of Composr's files using something like FTP and apply permissions to them – the typical method for most CMSs. This method takes much longer – as there is a pause for "handshaking" between each file. We maintain this version in case the quick installer fails on your host (e.g. if the host does not support PHP-accessible FTP or suEXEC in the way the quick installer needs).
Preparing files
Example of "Download Now" link
(Click to enlarge)
Download Composr from our website. Save it to a location where you'll be able to find it.
After it downloads, you'll need to extract the files. The exact methods for doing this will vary based on which ZIP utility you use.
Using SFTP/FTP
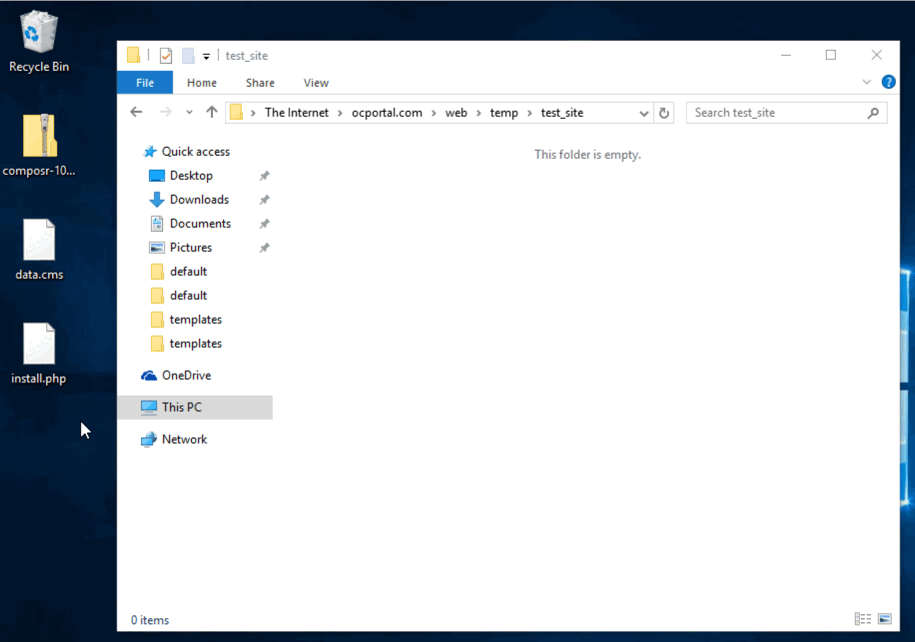
An alternative to uploading via SFTP/FTP is using the File Manager within the webhosting control panel. However it is worth trying to get it working using SFTP/FTP, as it is a valuable basic tool.File upload demonstration
(Click to enlarge)
Internet Explorer FTP login
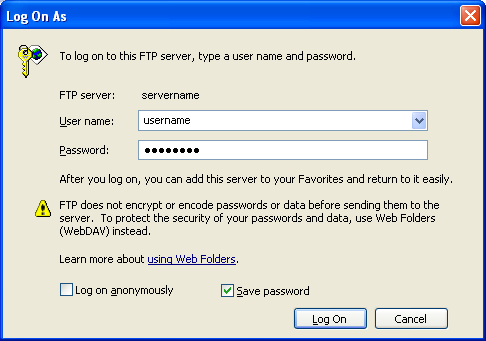
(Click to enlarge)
If you'd like to use the one bundled with Windows, open a new Internet Explorer window, and in the address bar, type ftp://username@servername.com, replacing username with your username and servername with the servername given to you by your webhost. You should be presented with a login screen (if not, you can access it by choosing File > Login As), where you can enter the username and password given to you by your webhost (image). Then you'll need to navigate to your webroot (possibly in a folder called www or httpdocs). If you can't find your webroot, e-mail your webhost for help.
At this point you need to decide whether you want your website to reside in your root folder or not. If you choose to place it in your root folder (which is the recommended option), people will be able to access your site by going to http://yourbaseurl (unless you don't own your own domain name). If you choose to place it in a subfolder (for example, "subfolder"), people will access your Composr installation by going to http://yourbaseurl.
When you successfully connect, find your webroot, and navigate into a subfolder if you chose to. You need to upload the files that were inside the ZIP package you downloaded. If you chose the quick installer, these files are called 'install.php', the other is called 'data.cms'. If you chose the manual installer, there will be many more.
You now need to put these files in the desired folder. This can usually be done by dragging and dropping the files from your computer to your webhost in your SFTP/FTP client (image).
Installation
The Composr installation screen
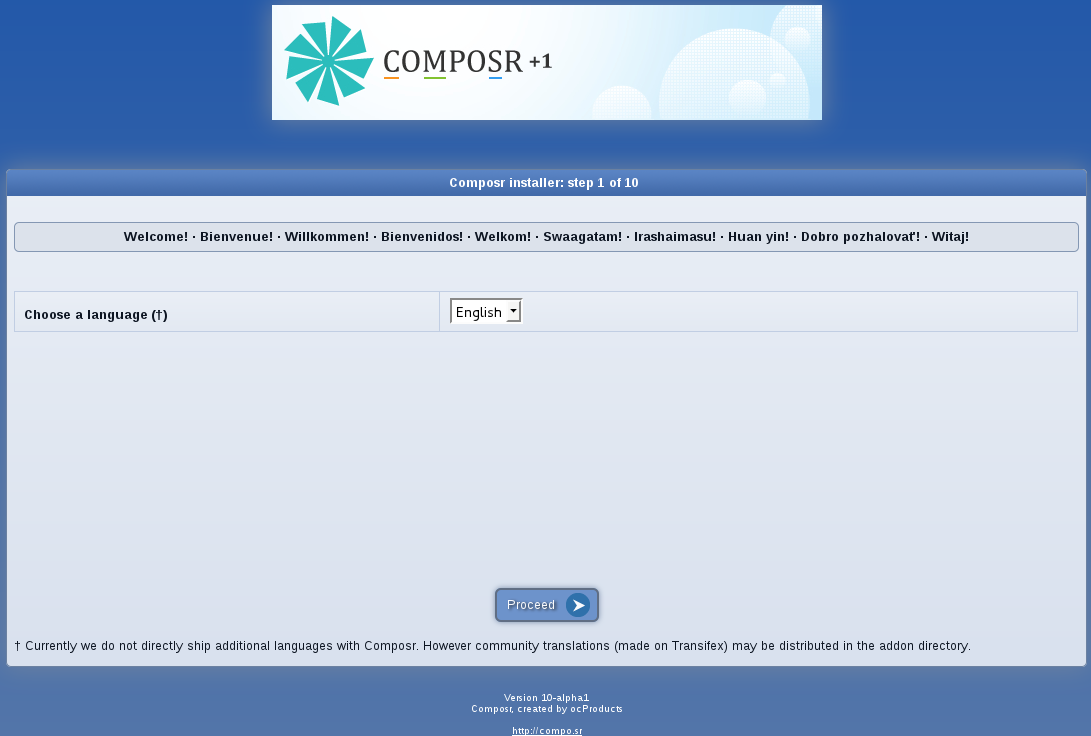
(Click to enlarge)
On step two, you are shown a licence agreement. You must agree to the licence agreement before you can install Composr. You also have the opportunity to sign up for our newsletter, which will notify you by e-mail of any updates to our software. Composr will never sell or rent your e-mail address to a third party. You can read our privacy policy for more information.
On step three, you are presented with a choice to choose which forum system you would like to use for your website. We strongly recommend that you use Composr's own forum (Conversr), which if chosen will be installed at the same time as Composr. If you're using a third-party forum software, then you will need to already have it installed. Select the name of the software on the left, and then choose the appropriate version from the right-hand column.
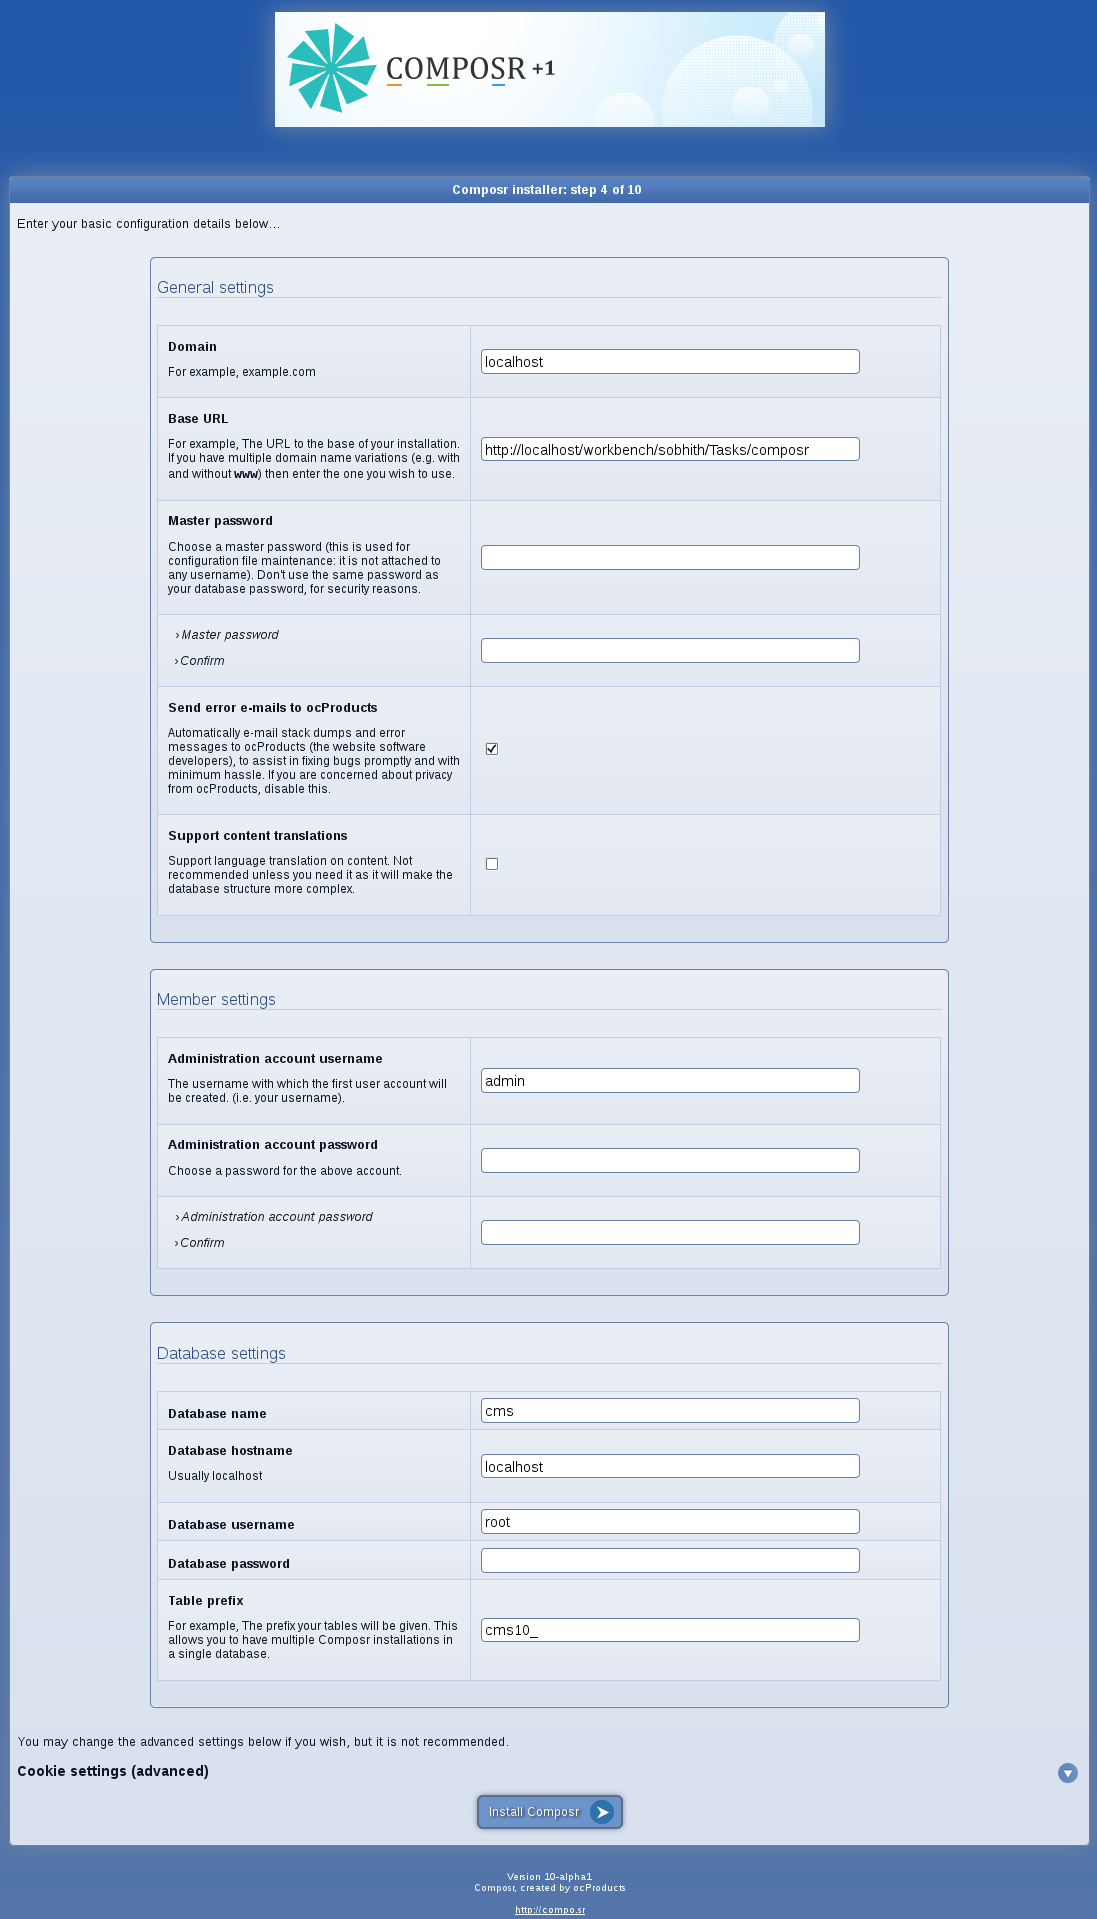
Step 4: primary configuration
(Click to enlarge)
Most of the settings will have been auto-detected for you. You will definitely need to fill in the following fields manually though:
- Master password
- Administration account password
- Database details
There are no constraints on the kind of password to use, but it is a good idea to choose one that won't easily be guessed, does not appear directly in a dictionary, but that you can easily remember.
All of the database fields should be filled out with the information you recorded earlier in this tutorial. When you finish, click the "Install Composr" link at the bottom of the screen.
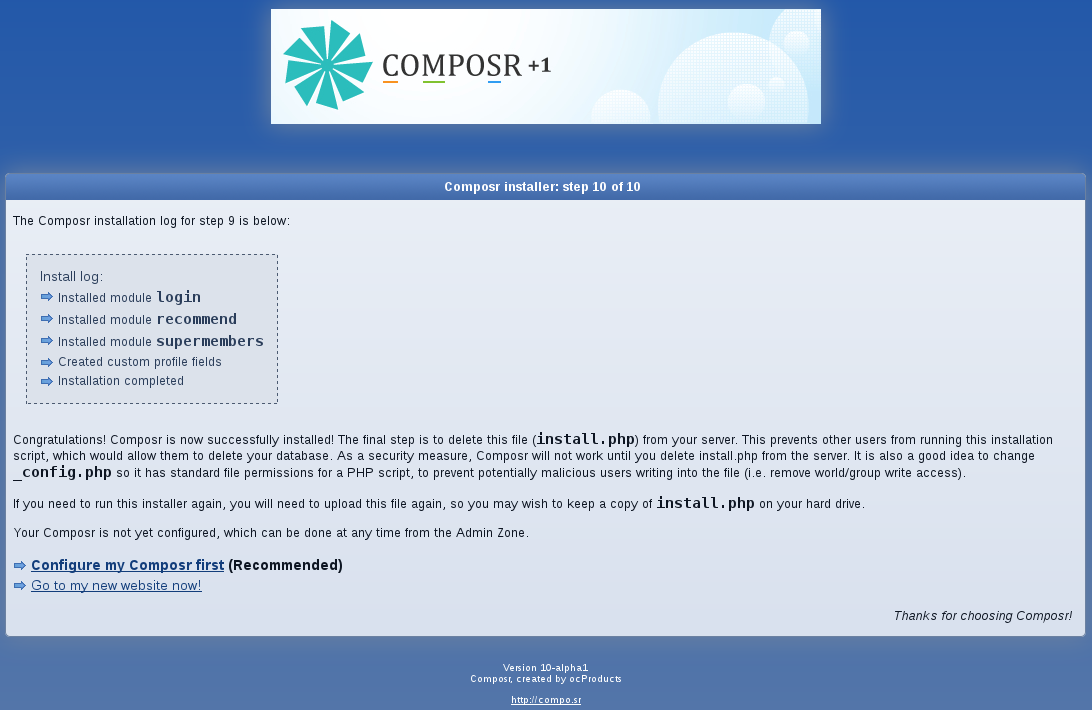
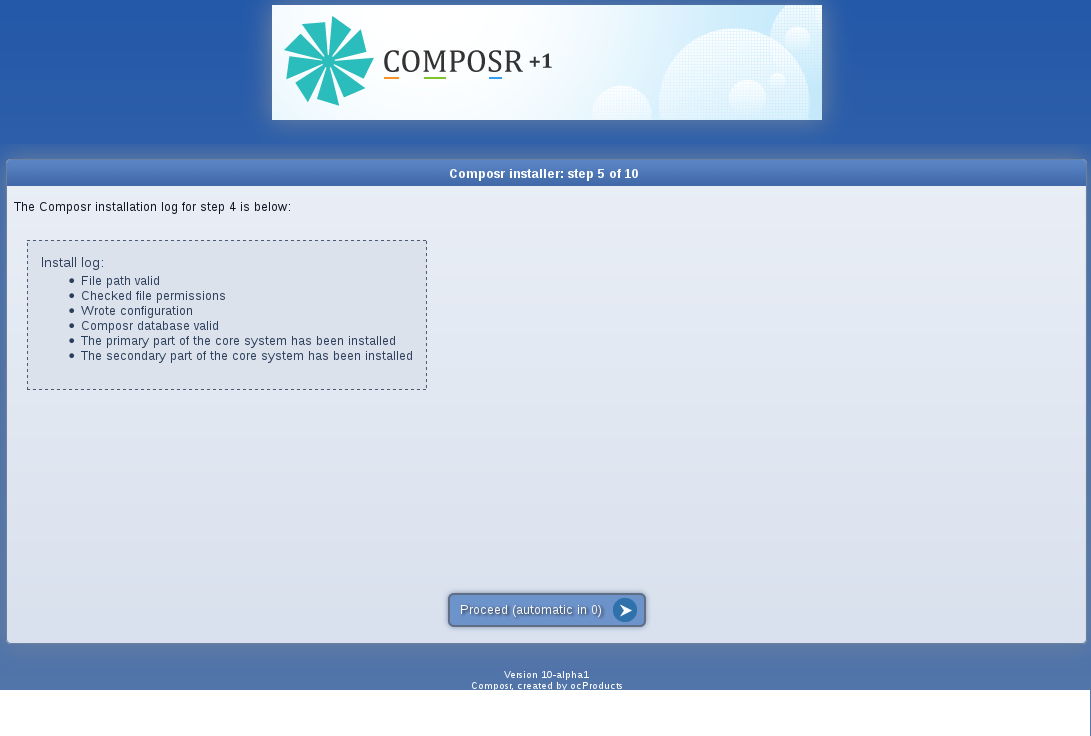
Hopefully, at this point you'll receive this success message. If you receive any errors, return to the previous page and correct them. Click the "Proceed" button to continue through the installation. There will be a few more similar screens until you finish the installation.
Final screen
(Click to enlarge)
Step 5: success message
(Click to enlarge)
As a final step you will have to delete the install.php and data.cms files you uploaded earlier, using SFTP/FTP (or the control panel's File Manager). This is important for security reasons and Composr will make you do this.
If you got an error message about having to delete the files just refresh the page once you have deleted them, and it will take you to where you intended to be.
The Setup Wizard ("Configure my Composr first") will guide you through some basic setup for your site, to give you a leg-up. It is not required, but most users will want to run it to set some basic things such as Site Name, colours, and what addons are to be kept installed.

Advice for webhosts
Note that Composr administrators have full control over their website code. They may execute their own custom PHP code trivially.Therefore if you control the hosting and provide someone with a Composr staff username you should ensure that your hosting is either:
- locked down to only that site
- that you provide a non-administrator staff account
- that you trust any administrator with full control over the hosting
Concepts
- Administrative password
- The administrative password is a special password that will help you restore settings if something makes the traditional Composr interface unusable.
- Multi-site networks (M.S.N.)
- Multi-site networks allow you to have more than one Composr installation (multiple websites), all running on the same network. If you choose this, members who join one website will also have registrations at other sites.
See also
- Basic Configuration
- The user-focused help page within Composr (linked from the menus)
- Web applications information
- Webhosting information (including Composr minimum requirements)
- Installing Composr on a Windows desktop
- Advanced installation
- Uninstalling Composr
Feedback
Please rate this tutorial:
Have a suggestion? Report an issue on the tracker.