
Composr Tutorial: Custom structured content (via catalogues)
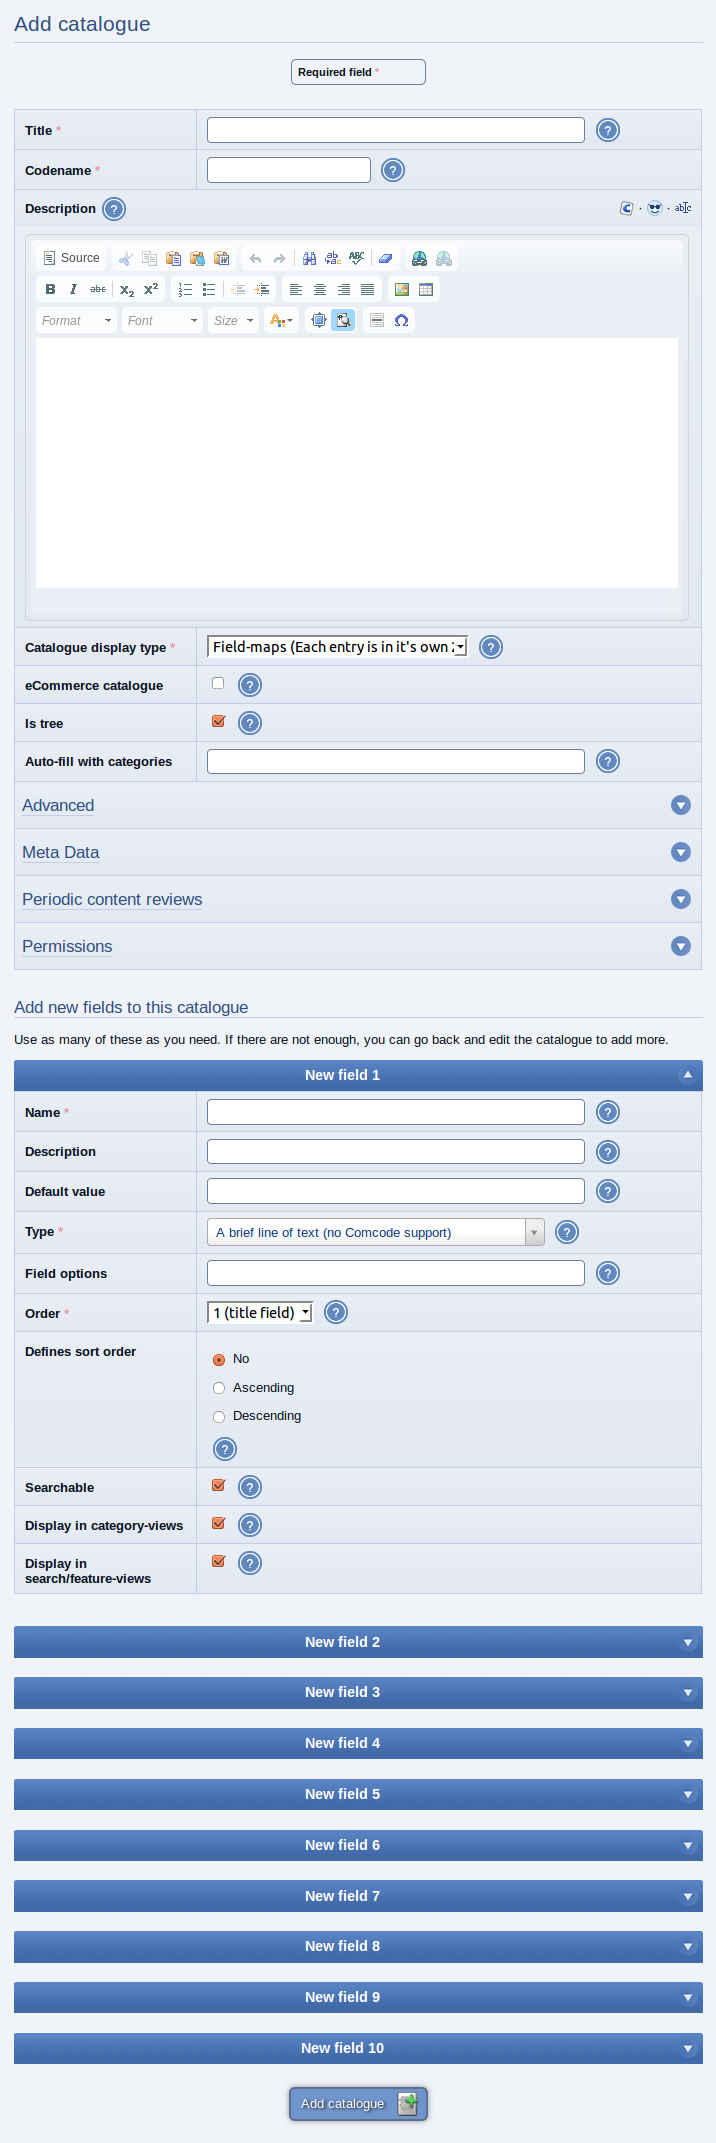
Adding a catalogue
(Click to enlarge)
You can have as many catalogs as you like, and some premade ones provided by default.
(in American English catalogues are spelled "catalogs")
The premade catalogues are:
- Links (for sharing links with visitors)
- FAQs (frequently asked questions and answers)
- Super-members projects (see the Running a collaboration hub: the Collaboration Zone tutorial)
- Contacts (a simple contacts directory / address book)
Catalogues can be used to model most things required by large websites that would otherwise have to be implemented either as new modules, or hard-coded pages. Note that catalogues are designed to store records of which there are likely more than one, not as a container for all unstructured custom information (that is what Comcode pages are for).
Catalogues are initially defined by the fields in them. 'Categories' are then made in the catalogue. Then categories are filled with 'entries'.
Table of contents
-
Composr Tutorial: Custom structured content (via catalogues)
- A warning
- Fields
- Modes of display
- Adding a catalogue
- Editing/deleting a catalogue
- Adding/editing/deleting categories.
- Adding/editing/deleting entries
- Viewing catalogues
- Permissions
- Customising the look & feel of catalogues (advanced)
- Searching catalogues
- CSV import
- Creating a tree catalogue, fast (advanced)
- Breadcrumbs (advanced)
- Custom fields for other content types
- Special kinds of catalogues
- See also
A warning

For a more detailed discussion, see the How to approach complex projects tutorial.
I also highly advise reading the what Composr is not page which tries to spell out the practical realities of how to work with Composr (or any CMS really).
There are loads of features within the catalogue system, and there are more we could add to give yet further power that could be sponsored. Just proceed with caution, considering the cases laid out below.
Database design
A single catalogue entry can easily have 20 database rows associated with it (to be exact it is the number of fields in the catalogue plus one) -- that's a lot in the database.Considerations you may not have thought of:
- sophisticated data relationships
- efficient searching
- data reliability
- ease of manual editing
Custom editing interfaces
You may find the auto-generated add/edit form isn't good enough for you. If this is the case, you'd be best off coding a new content type directly, so that you have full control.Adding new features
If you later want to add some custom code features for interacting with catalogue data, it is a lot harder programming with the level of abstraction that catalogues have.Limitations
To preserve performance limitations may be imposed, including:- Sorting may not be done on translatable/Comcode fields if you have over 300 records in a result set (typically a result set is a category)
- … or sorting by distance from co-ordinates in the same condition (advanced feature)
Fields
A catalogue consists of a number of fields.You may order the fields, make some invisible, make some optional, and choose which defines ordering.
The first field in a catalogue is used as the title field for entries in that catalogue.
You may also specify which fields may be used to search the catalogue (searching is performed with the regular Composr search module).
For details about the actual field types you can use, see the Custom fields tutorial.
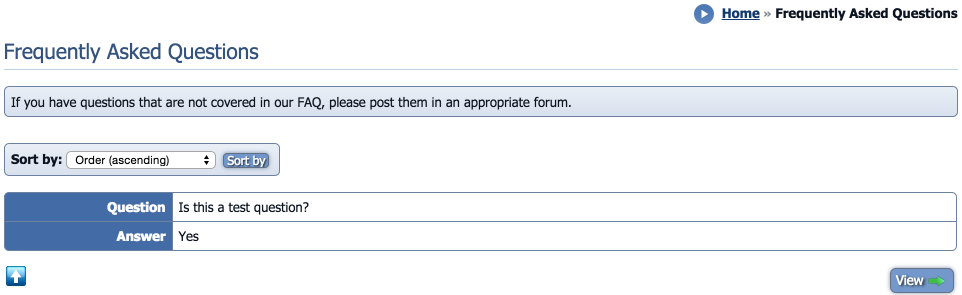
Modes of display
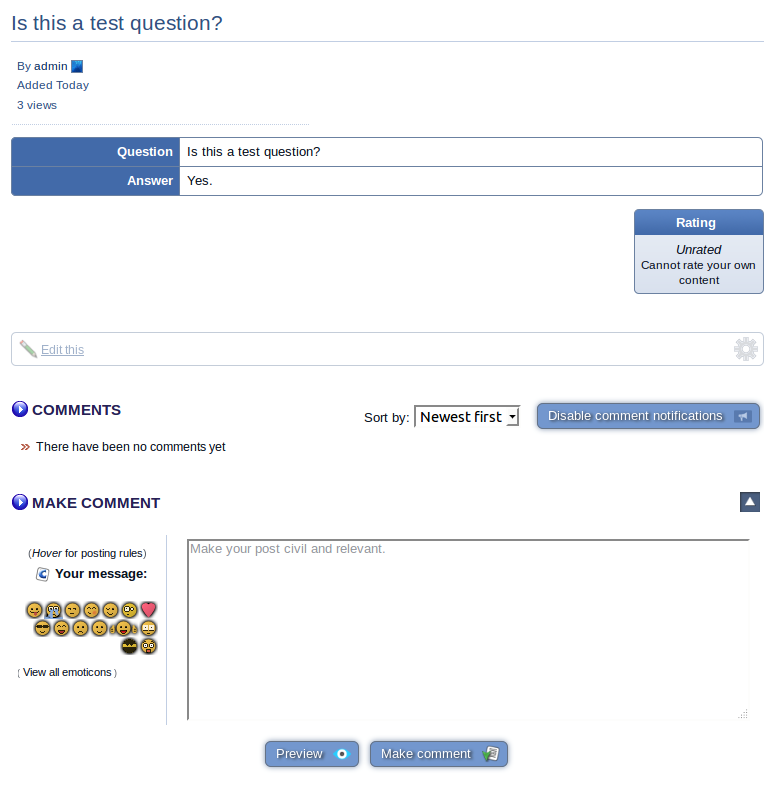
Viewing a catalogue entry
(Click to enlarge)
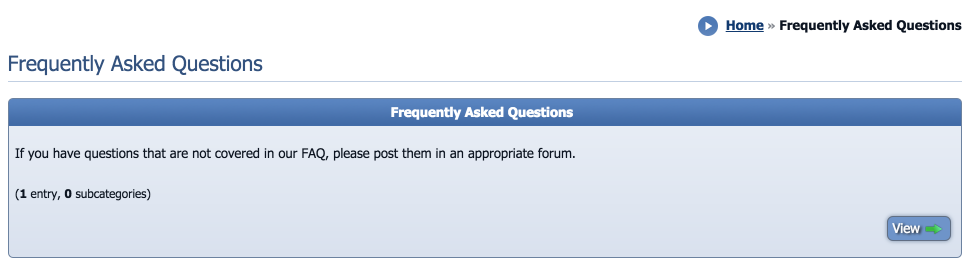
A non-tree catalogue uses an index
(Click to enlarge)
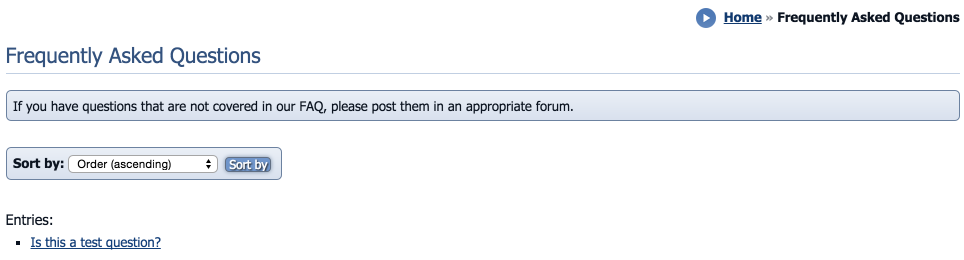
- 'Display type' -- you can display entries in categories as title lists, field-maps, tabular listings, or in a grid of images (full customisation is possible via templating).
- 'Is tree' -- a tree catalogue has a full hierarchical category tree, much like the download system does; a non-tree catalogue just shows the categories from a single catalogue index.
Note that if you set all fields of your catalogue to "Display in category-views" and disable comments and trackbacks, there will be no links to the entry view screen. This is due to there being little purpose in this screen because everything already displays on categories.
If you want to change this behaviour then you can edit the relevant display template (e.g. CATALOGUE_DEFAULT_GRID_ENTRY_WRAP.tpl) to replace {VIEW_URL} with {$PAGE_LINK,_SEARCH:catalogues:entry:{ID}} and {VIEW_URL*} with {$PAGE_LINK*,_SEARCH:catalogues:entry:{ID}}.
Display type
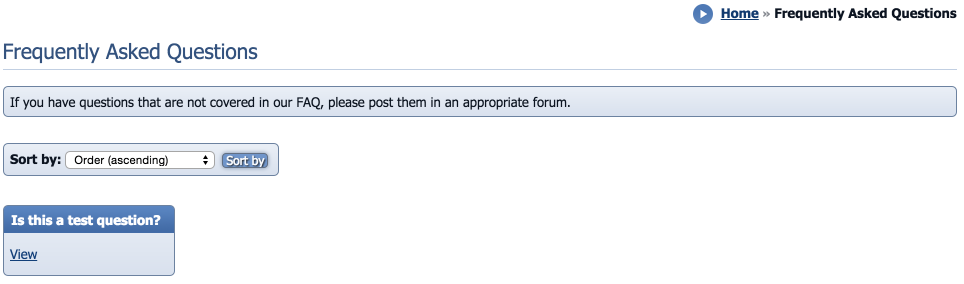
A catalogue with a display type of Title lists – entries link onto their own pages
(Click to enlarge)
Title lists
Title lists are very simple lists of links. Each link links through to the full entry screen.Templates:
- CATALOGUE_*_TITLELIST_ENTRY.tpl
- CATALOGUE_*_TITLELIST_WRAP.tpl
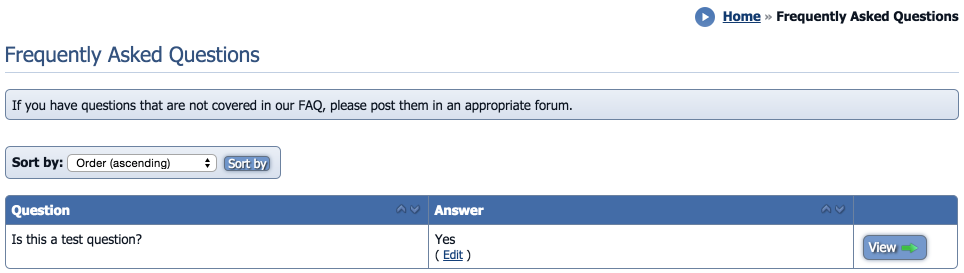
A catalogue with a display type of Field-maps
(Click to enlarge)
Field-maps
Field-maps are the most flexible display type because they can easily and automatically expand to show as much field data within the category view as you want.Templates:
- CATALOGUE_*_FIELDMAP_ENTRY_WRAP.tpl
- CATALOGUE_*_FIELDMAP_ENTRY_FIELD.tpl
A catalogue with a display type of Tabular listings
(Click to enlarge)
Tabular listings
Tabular listings will show your entries in columns. This works well if the data within any particular category-displayed field is short, and if there aren't too many of them.Templates:
- CATALOGUE_*_TABULAR_ENTRY_WRAP.tpl
- CATALOGUE_*_TABULAR_ENTRY_FIELD.tpl
- CATALOGUE_*_TABULAR_HEADCELL.tpl
- CATALOGUE_*_TABULAR_WRAP.tpl
A catalogue with a display type of Grid of images (not a good example, because to show it properly we should have an image field, and lots of entries)
(Click to enlarge)
Grid of images
This is probably the most attractive display, and works well if you only really need to show a title and a thumbnail on the category screen.The default template (CATALOGUE_DEFAULT_GRID_ENTRY_WRAP.tpl) assumes the first field is the title and the second field is the picture.
You therefore need to either:
- Follow this convention
- Create CATALOGUE_yournewcatalogue_GRID_ENTRY_WRAP.tpl such that it references a different field sequence number (replace FIELD_1_THUMB, noting that we're counting field sequence numbers starting from zero)
However there is an important exception to the above. The products catalogue already is bundled with a custom template set which is already referencing a different picture field. You also are not supposed to rearrange the first few fields in the products catalogue because they have a hard-coded meaning.
Templates:
- CATALOGUE_*_GRID_ENTRY_WRAP.tpl
- CATALOGUE_*_GRID_ENTRY_FIELD.tpl
Embedded ratings (advanced)
Ratings will only appear on category views if there are no separate entry views. There are no separate entry views if all these conditions are met:- All fields are visible on categories
- Trackbacks are not enabled
- Commenting is not enabled
You may be surprised that rating doesn't show on views for the bundled links catalogue, even if you manually add in the {RATING} Tempcode parameter somewhere to the entry templates. This is because the URL field is not set to visible, due to how it is folded in with the title field in the template.
This can be remedied by manually adding a rating field to the templating. The changes (which would be done in proper template overrides) would be like this:
Code (Diff)
index 70069923c..3cf08b8ae 100644
--- a/themes/default/templates/CATALOGUE_links_TABULAR_ENTRY_WRAP.tpl
+++ b/themes/default/templates/CATALOGUE_links_TABULAR_ENTRY_WRAP.tpl
@@ -3,5 +3,9 @@
<tr class="{$CYCLE,results_table_zebra,zebra_0,zebra_1}">
{FIELDS_TABULAR}
+
+ <td>
+ {$RATING,catalogues__links,{ID},{SUBMITTER},{$SELF_URL},{FIELD_1_PLAIN},RATING_INLINE_DYNAMIC}
+ </td>
</tr>
diff --git a/themes/default/templates/CATALOGUE_links_TABULAR_WRAP.tpl b/themes/default/templates/CATALOGUE_links_TABULAR_WRAP.tpl
index c2d0d36ae..83ba46381 100644
--- a/themes/default/templates/CATALOGUE_links_TABULAR_WRAP.tpl
+++ b/themes/default/templates/CATALOGUE_links_TABULAR_WRAP.tpl
@@ -13,6 +13,19 @@
<thead>
<tr>
{HEAD}
+
+ <th>
+ Rating
+
+ <span class="table_header_sorting">
+ {+START,IF,{$NEQ,{$PAGE},search}}
+ <a target="_self" href="{$SELF_URL*,0,0,0,module_order=compound_rating ASC}"><img src="{$IMG*,results/{$?,{$EQ,{$_GET,module_order},compound_rating ASC},sortablefield_asc,sortablefield_asc_nonselected}}" title="{!SORT_BY} Rating, {!ASCENDING}" alt="{!SORT_BY} Rating, {!ASCENDING}" /></a>
+ {+END}
+ {+START,IF,{$NEQ,{$PAGE},search}}
+ <a target="_self" href="{$SELF_URL*,0,0,0,module_order=compound_rating DESC}"><img src="{$IMG*,results/{$?,{$EQ,{$_GET,module_order},compound_rating DESC},sortablefield_desc,sortablefield_desc_nonselected}}" title="{!SORT_BY} Rating, {!DESCENDING}" alt="{!SORT_BY} Rating, {!DESCENDING}" /></a>
+ {+END}
+ </span>
+ </th>
</tr>
</thead>
Adding a catalogue
To add a catalogue (among other functions) go to Content Management > Catalogues > Add catalogue.Once a catalogue is added it will get its own icon under Content Management.
Editing/deleting a catalogue
Editing a catalogue

(Click to enlarge)
Content Management > Catalogues > Edit catalogue, or from under Content Management > <Catalogue name>.
You cannot change field data types after you have created them (except between field types that have the same "storage" type) as this would affect the integrity of any data that may have already been entered into them. A workaround is to export to CSV, delete the field, create a new field with the same name and the new type, and reimport the CSV.
You can delete a catalogue from the bottom of its edit form.
Adding/editing/deleting categories.
There are a whole host of options available after catalogue activity
(Click to enlarge)
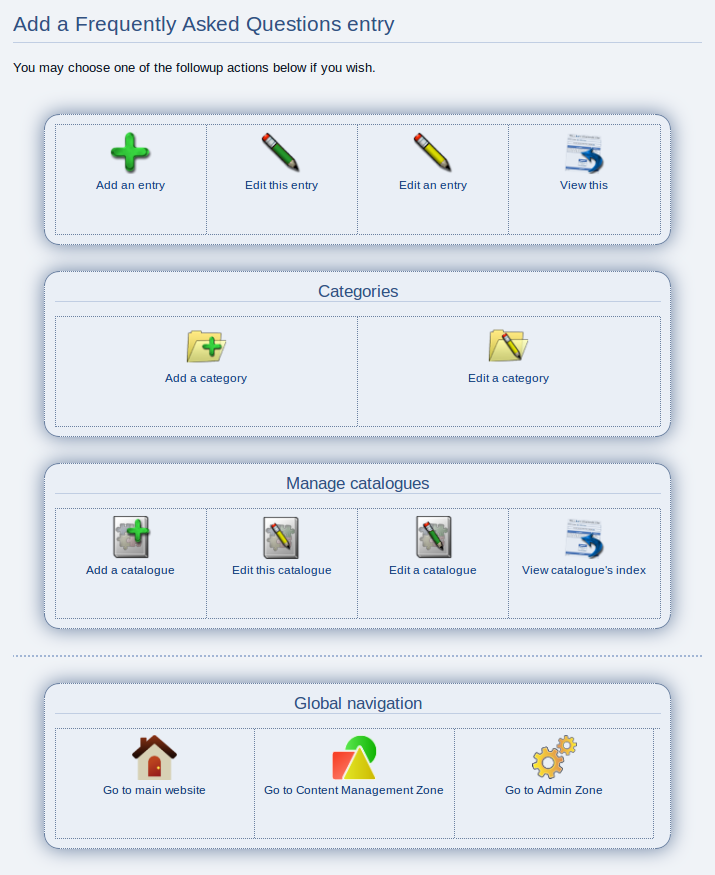
Adding an entry to a catalogue
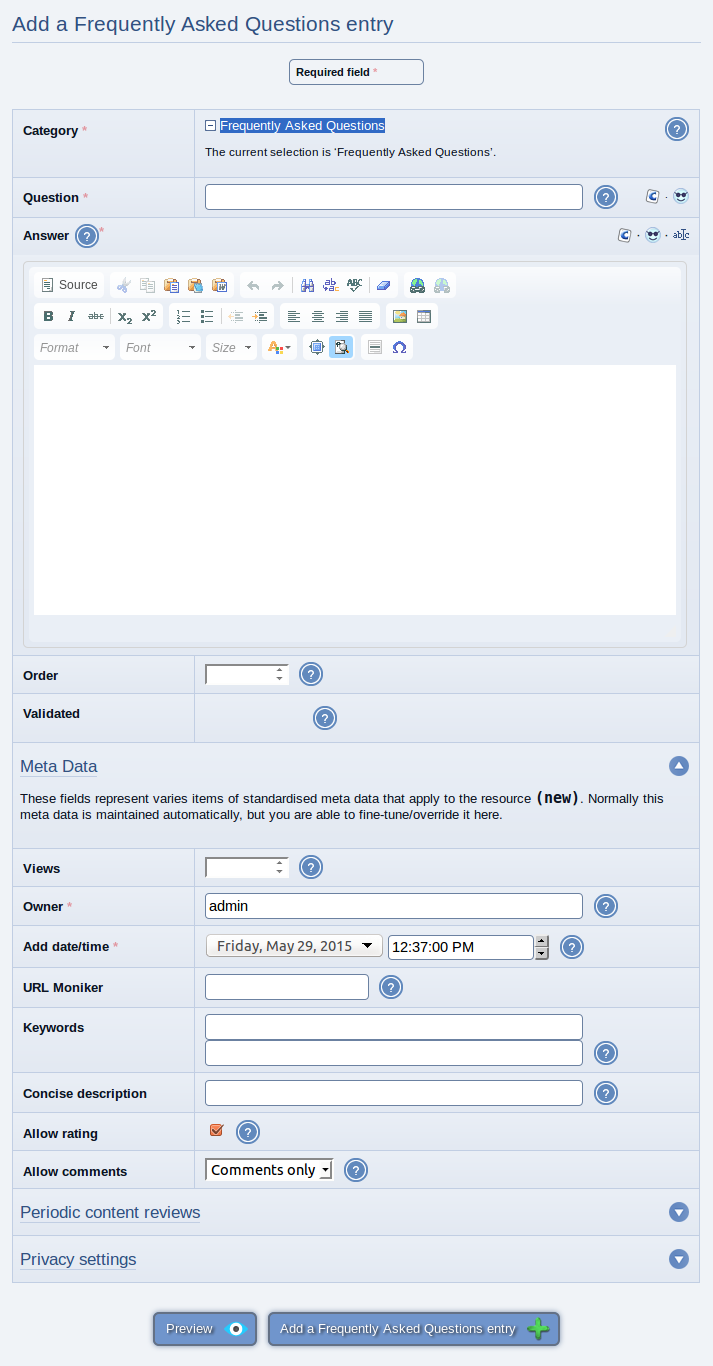
(Click to enlarge)
Choosing a catalogue to add an entry to
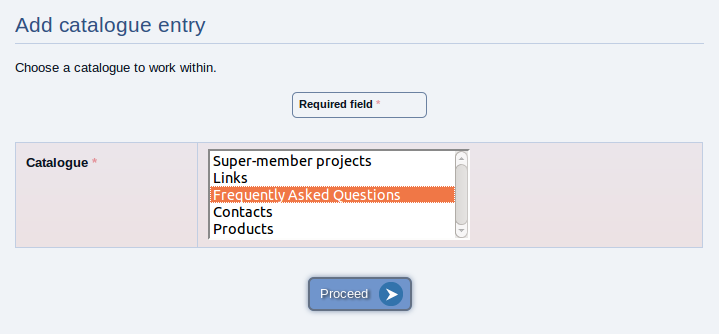
(Click to enlarge)
Content Management > <Catalogue name>.
You can delete a category from the bottom of its edit form. A root catalogue category cannot be deleted, however.
Adding/editing/deleting entries
Add or edit entries from:Content Management > <Catalogue name>. A form has been built for you automatically.
You can delete an entry from the bottom of its edit form.
Viewing catalogues
You view catalogues via the catalogues module (site:catalogues:index:<catalogue-name> page-link gets you to a catalogue's index, which lists all categories under the catalogue). Links to individual catalogues are automatically added under Content on the default menus.Permissions
Like other Composr content types, catalogues support access permissions. However because catalogues essentially allow many different content types to be produced (each in their own catalogue), there is an extra layer of permissions available: you may set access permissions for both catalogues, and categories within them.If you manually alter the templates so that upload/picture fields display the raw URL, rather than going through Composr's downloader script, then you will need to delete the uploads/catalogues/.htaccess file. By default permissions are denied to directly access these URLs, to prevent users without catalogue access from accessing individual files.
Note that assigning permissions to add/edit whole catalogues comes with a high risk -- as permission to post any Comcode/HTML effectively comes with permission to add the catalogue.
Customising the look & feel of catalogues (advanced)
If you have multiple catalogues on your website and you wish for them to have customised appearances, this is possible for advanced users via one of two ways:Tempcode programming
It is possibly to achieve template customisation wholly within the default set of templates, by using template programming. The catalogue name is passed into every catalogue template meaning you can use template IF directives to differentiate against that name, producing different output accordingly.While the main CATALOGUE_DEFAULT_FIELDMAP_ENTRY_WRAP.tpl template uses the FIELDS parameter by default (which consists of precomposited template field rows, built using the other templates), it is also given special parameters correlating to each individual field row and each individual field value. You may thus entirely customise the catalogue look using these low level values to make very customised arrangements that are more complex than the simple tabular arrangement used by default.
For example, take the CATALOGUE_DEFAULT_FIELDMAP_ENTRY_WRAP.tpl template:
Code (HTML)
{+START,IF,{GIVE_CONTEXT}}
<div class="box"><div class="box_inner">
{+END}
{+START,IF,{$NOT,{GIVE_CONTEXT}}}
<div class="catalogue_fieldmap_entry_wrap">
{+END}
{+START,IF,{GIVE_CONTEXT}}
<h3>{!CATALOGUE_GENERIC,{CATALOGUE_TITLE*}}</h3>
{+END}
<div class="wide_table_wrap"><table class="map_table wide_table results_table spaced_table">
{+START,IF,{$NOT,{$MOBILE}}}
<colgroup>
<col class="catalogue_fieldmap_field_name_column" />
<col class="catalogue_fieldmap_field_value_column" />
</colgroup>
{+END}
<tbody>
{FIELDS}
</tbody>
</table></div>
{+START,IF_PASSED,BREADCRUMBS}
{+START,IF_NON_EMPTY,{BREADCRUMBS}}
<nav class="breadcrumbs" itemprop="breadcrumb" role="navigation"><p>{!LOCATED_IN,{BREADCRUMBS}}</p></nav>
{+END}
{+END}
{+START,IF_NON_PASSED_OR_FALSE,ENTRY_SCREEN}
<div class="float_surrounder">
{+START,IF,{$NOT,{GIVE_CONTEXT}}}
<p class="left">
<a target="_self" href="#"><img class="top_vertical_alignment" title="{!BACK_TO_TOP}" alt="{!BACK_TO_TOP}" src="{$IMG*,icons/24x24/tool_buttons/top}" srcset="{$IMG*,icons/48x48/tool_buttons/top} 2x" /></a>
</p>
{+END}
{+START,IF_NON_EMPTY,{VIEW_URL}}
<p class="{$?,{GIVE_CONTEXT},shunted_button,right}">
<a class="buttons__more button_screen_item" title="{!VIEW}{+START,IF_PASSED,FIELD_0}: {$STRIP_TAGS*,{FIELD_0}}{+START,IF_PASSED_AND_TRUE,COMMENT_COUNT} ({$STRIP_TAGS,{$COMMENT_COUNT,catalogues,{ID}}}){+END}{+END}" href="{VIEW_URL*}"><span>{!VIEW}</span></a>
</p>
{+END}
{+START,IF_EMPTY,{VIEW_URL}}{+START,IF_NON_EMPTY,{EDIT_URL}}
<p class="{$?,{GIVE_CONTEXT},shunted_button,right}">
<a class="buttons__edit button_screen_item" href="{EDIT_URL*}" title="{!EDIT}{+START,IF_PASSED,FIELD_0}: {$STRIP_TAGS*,{FIELD_0}}{+END}"><span>{!EDIT}</span></a>
</p>
{+END}{+END}
</div>
{+END}
{+START,IF,{$NOT,{GIVE_CONTEXT}}}
</div>
{+END}
{+START,IF,{GIVE_CONTEXT}}
</div></div>
{+END}
Our simple change. This is obviously a very basic change, but I just wanted to give one real quick example.
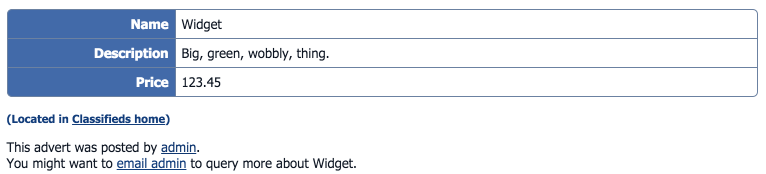
(Click to enlarge)
Code (HTML)
<p>
This advert was posted by
<a href="{$PAGE_LINK*,_SEARCH:members:view:{SUBMITTER}}">{$USERNAME*,{SUBMITTER}}</a>.<br />
You might want to
<a href="{$PAGE_LINK*,_SEARCH:contact_member:browse:{SUBMITTER}}">e-mail {$USERNAME*,{SUBMITTER}}</a>
to query more about {FIELD_0*}.
</p>
{+END}
You can see how you can reference individual fields in the template like {FIELD_0}.
For a full table of fields you can use, put {+START,PARAM_INFO}{+END} temporarily into the template, and it will show you everything defined in a neat table.
Field values are available in three forms:
- Standard (e.g. {FIELD_0}) -- Parsed for Comcode (if applicable), and rendered by the field code
- Plain (e.g. {FIELD_0_PLAIN}) -- Parsed for Comcode (if applicable), and not rendered by the field code
- Pure (e.g. {FIELD_0_PURE}) -- Not parsed for Comcode, and not rendered by the field code
- Thumbnail (e.g. {FIELD_0_THUMB}) -- Thumbnail version of a picture (i.e. using standardised thumbnail display, rather than a display rendered by the field code); applies to picture fields only
Custom template sets
With some file system manipulation, you may make use of the 'custom template sets' feature. You then need to go to the themes/default/templates directory in Composr and copy all the CATALOGUE_DEFAULT_*.tpl files to themes/default/templates_custom/CATALOGUE_<your-catalogue-codename>_*.tpl.You would then customise these templates as appropriate.
When we talk about default catalogue template set, we are referring to the CATALOGUE_DEFAULT_*.tpl files rather than referring to the default theme or the default versions within that theme. It is possible for custom themes to have their own versions of the default catalogue template set, and also per-catalogue versions.
We're using the word default in different contexts, so to clarify:
- themes/default/templates/CATALOGUE_DEFAULT_*.tpl -- the default theme's default default template set
- themes/default/templates_custom/CATALOGUE_DEFAULT_*.tpl -- the default theme's overridden default template set (i.e. a site's owner has decided to override it but not on a per-theme basis)
- themes/default/templates_custom/CATALOGUE_somecatalogue_*.tpl -- the default theme's custom template set for the somecatalogue catalogue
- themes/mytheme/templates_custom/CATALOGUE_DEFAULT_*.tpl -- the mytheme theme's overridden default template set
- themes/mytheme/templates_custom/CATALOGUE_somecatalogue_*.tpl -- the mytheme theme's custom template set for the somecatalogue catalogue
We intentionally did not provide a highly user-friendly interface for enabling custom template sets because the process of working with multiple sets of templates is inherently difficult, and by setting it up manually you will get a better feeling for what Composr does.
Seamless catalogues
As well as customising the catalogue templates, you may also customise the language strings used by catalogues in a similar way to how custom template sets are customised. This gives you further control on how things appear to visitors within a particular catalogue.To do this, you need to manually edit the lang/EN/catalogues.ini file to add new equivalents to the DEFAULT__* strings (where 'DEFAULT' is replaced with the codename of the catalogue that you are customising for). In fact, you should actually save your changes into lang_custom/EN/catalogues.ini, so that they are not lost during upgrades.
You can see this has already been done for some of the default catalogues:
Code (INI)
links__CATALOGUE_CATEGORY={1}
links__CATALOGUE_ENTRY=Link: {1}
Here's what they do:
- <catalogue-name>__CATALOGUE_INDEX -- Used to make the screen title when viewing the catalogue index
- <catalogue-name>__CATALOGUE_CATEGORY -- Used to make the screen title when viewing a catalogue category
- <catalogue-name>__CATALOGUE_ENTRY -- Used to make the screen title when viewing a catalogue entry
If you have the language cache enabled then you will need to empty the language cache before these changes will show up.
You can also add descriptions to the add and edit screens for catalogues by creating new strings like:
Code (INI)
CATALOGUE_<catalogue-name>_EDIT_TEXT=Shown on edit screen.
Here's an example lang_custom/EN/catalogues.ini for having customised strings for a classifieds catalogue:
Code (INI)
classifieds__CATALOGUE_INDEX=Advertisement categories: {1}
classifieds__CATALOGUE_CATEGORY={1} advertisements
classifieds__CATALOGUE_ENTRY={1} (private advertisement)
CATALOGUE_classifieds_ADD_TEXT=Your advertisement is now live on our site.
CATALOGUE_classifieds_EDIT_TEXT=Your advertisement has been edited. The changes can be seen immediately.
Searching catalogues
The Composr search module provides special support for searching catalogues by matching against field values. You can choose which fields are searchable when you add them to the catalogue (or when you go back to edit).For more information see the Searching your website tutorial.
CSV import
You can import CSV files into catalogues. Be aware this adds entries only, it doesn't try and do any merging with what is already there.You can also export CSV files. Some general notes about using CSV files with Composr may be found in the Advanced Composr member system tutorial, as importing/exporting members via CSV files is the most common use of CSV files within Composr.
Creating a tree catalogue, fast (advanced)
There is a special feature on the screen to add a catalogue with a category tree constructed automatically for it.To define the tree you just need to type in the categories you want in a special format that is very quick to write.
This is best shown by example, so here is an example for a catalogue category tree with that has categories for each of the states/provinces in the USA and Canada:
Code (Text)
Breadcrumbs (advanced)
The breadcrumb structure for catalogue is quite subtle as it depends on various factors:- Configured breadcrumb XML code
- Tree catalogue vs Non-tree catalogue
- Virtual roots
By default catalogue breadcrumbs include the list of catalogues. However, Composr also provides some default breadcrumbs XML that takes this out, because most webmasters don't want users to think of catalogues as anything separate.
Tree catalogues don't include a link back to the index for the catalogue, while non-tree catalogues do. This is because a tree catalogue provides full category access via the root, while a non-tree catalogue relies on the index.
If a virtual root is set then it will cut off everything before the virtual root (including parent categories, the index, and the list of catalogues). Virtual roots for catalogues are opened up with the keep_catalogue_<catalogue-name>_root URL parameter.
The default breadcrumb XML looks like this…
Code (XML)
<substitution match_key="_WILD:catalogues:index:tree=0" final="true"> <!-- Skip catalogues list. -->
<link label="{!HOME}">:</link>
</substitution>
<substitution match_key="_WILD:catalogues:category"> <!-- Skip catalogues list. This rule won't run for non-tree catalogues as the above rule terminates first; i.e. it is only for tree catalogues -->
<link label="{!HOME}">:</link>
</substitution>
<substitution match_key="_WILD:catalogues:atoz"> <!-- Skip catalogues list. -->
<link label="{!HOME}">:</link>
</substitution>
Screenshots with default breadcrumb XML
Tree catalogue
Viewing a category

Viewing a subcategory

Viewing an entry

Non-tree catalogue
Viewing an index

Viewing a category

Viewing an entry

Screenshots without default breadcrumb XML
Tree catalogue
Viewing a category

Viewing a subcategory

Viewing an entry

Non-tree catalogue
Viewing an index

Viewing a category

Viewing an entry

Custom fields for other content types
Most content types in Composr allow you to choose custom fields for them. This is actually powered by catalogues -- catalogue entries are automatically associated with other content entries, in order to extend them.Upload security
Note that upload security (for file, picture, and video fields) is not perfect for custom fields. The security is checked when accessing a file field if it is a catalogue entry, but there is no mechanism to check the permissions of the content for which custom fields are attached.A similar caveat holds true for custom profile fields, which share the same field types.
Special kinds of catalogues
eCommerce catalogues
Composr can have special eCommerce catalogues, which integrate with the Composr shopping cart. These catalogues provide the following special functionality:- special templating for tidy product display
- easy adding to the shopping cart
- tax calculation
- stock counting
- view tracking
An eCommerce catalogue always assumes it has a number of special eCommerce fields as the first fields in the catalogue. The default product catalogue is configured like this and thus can be used as a reference for creating more product catalogues, if desired (few users will, however, require more than one product catalogue).
If an eCommerce catalogue is not correctly configured errors will occur.
The special eCommerce fields are:
- title
- code
- price_pre_tax
- reduction_start
- reduction_end
- stock_level [allows blank, meaning 'not stock counted']
- stock_level_warn_at [allows blank, meaning 'not stock counted']
- stock_level_maintain
- tax_type
- weight
- description
Classified ads
Catalogues are ideal for setting up a classified ads system. In fact, there is special support for this as you can program a catalogue to move entries to an archival category after a specified period of time passes. There is also a permission ('Have a longer expiry-time for catalogue entries') that allows you to grant usergroups a longer period of advert display.This feature works by logging the date/time for each entry added. This is stored in the ce_last_moved field in the database, under each entry. Any entry in a category that has a move target assigned will be scanned to see if the ce_last_moved date/time is more than the configured number of move days. If it is, the entry is moved. When an entry is moved, the ce_last_moved date/time is reset to the current time. Therefore you could, if you wished, set up chains of movements. There is no way in the Composr UI to change ce_last_moved manually (it is not affected by manual moves, validation, or editing), although you could manually make changes to it in the database or you could manually move it back after it has moved and therefore the timer reset. As the movement happens in the CRON bridge scheduler, the scheduler must be enabled for it to work.
The non-bundled classified ads addon overrides the functionality of ce_last_moved and uses it to track listing times. Unlike the default functionality, this de-validates entries rather than moving them (to allow listing extensions).
See also
- Custom fields
- Catalogues in Composr
- Adding standalone pages of content (via Comcode)
- Catalogue field references
Feedback
Have a suggestion? Report an issue on the tracker.