
Composr Tutorial: Customising what's on the menus
Written by Chris Graham (ocProducts)
'Menus' usually reside either in the header, or on panel-pages ('panels') placed around the main section of the website. They consist of links which may be organized in a tree structure, and displayed in various ways (for example, as pop-up menus, or expandable menus).Table of contents
- Composr Tutorial: Customising what's on the menus
The default menu
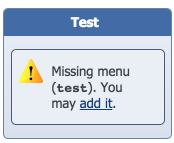
When you install Composr there is a menu already there in the header. This menu is automatically generated from the Sitemap (i.e. on-the-fly using an algorithm) and not directly editable in any way. It is quite nice in that any content categories you add will automatically show in the navigation.If you try and edit the default menu then Composr will offer to copy everything through to an editable menu, which you may then fully customise. Composr will never add anything to your editable menu for you as it can't deduce your intention for your site's navigation. There are, however, features to help you locate page-links to add, and also to auto-include subtrees of the Sitemap into your menu (see "Menu auto-generation / chaining").
If you want to revert back to the default menu then you need to go to Admin Zone > Setup > Configuration > Theme options, and change the "Header-menu call string" option back to the default. The default will be shown if you click to view the description for that configuration option. Copy and paste it exactly.
Template sets / menu types
The menu system supports 'template sets' to allow different kinds of menu on a website.The template set to use is specified as one of the parameters to the menu block.
The following template sets exist:
- embossed (the default type, a very simple single-layered type for side-placed menus; big buttons to make it tablet-friendly; does not support multiple-levels)
- tree (for side-placed menus where branches can be contracted and expanded as drawers; supports multiple-levels)
- popup (for side-placed menus where branches may popup as overlays by hovering the mouse over other branches; supports multiple-levels)
- dropdown (for top-placed menus; supports multiple-levels)
- sitemap (a spaced out menu type with expanders and contractors, designed for display on a page)
- select (select menu items via a dropdown list; does not support multiple-levels)
Template sets contain the following templates:
- MENU_*.tpl
- MENU_BRANCH_*.tpl
- MENU_SPACER_*.tpl
The menu structure is conceptually separate from the template set. If you wanted you could have a single menu structure displayed using every possible template set. However, for usability reasons Composr will adapt the menu editing interface a bit depending on the context you're editing for (i.e. the edit menu button will open up the menu editor in with an interface optimised for how the menu was displayed for that instance).
Tip

Adding and editing menus
Adding a new menu
(Click to enlarge)

The easiest way to edit a menu is to click the 'edit menu' link shown underneath, much like when clicking the 'edit page' link to edit the panel page.
Alternatively you can go to:
Admin Zone > Structure > Menu management
The menu editor
The menu editor
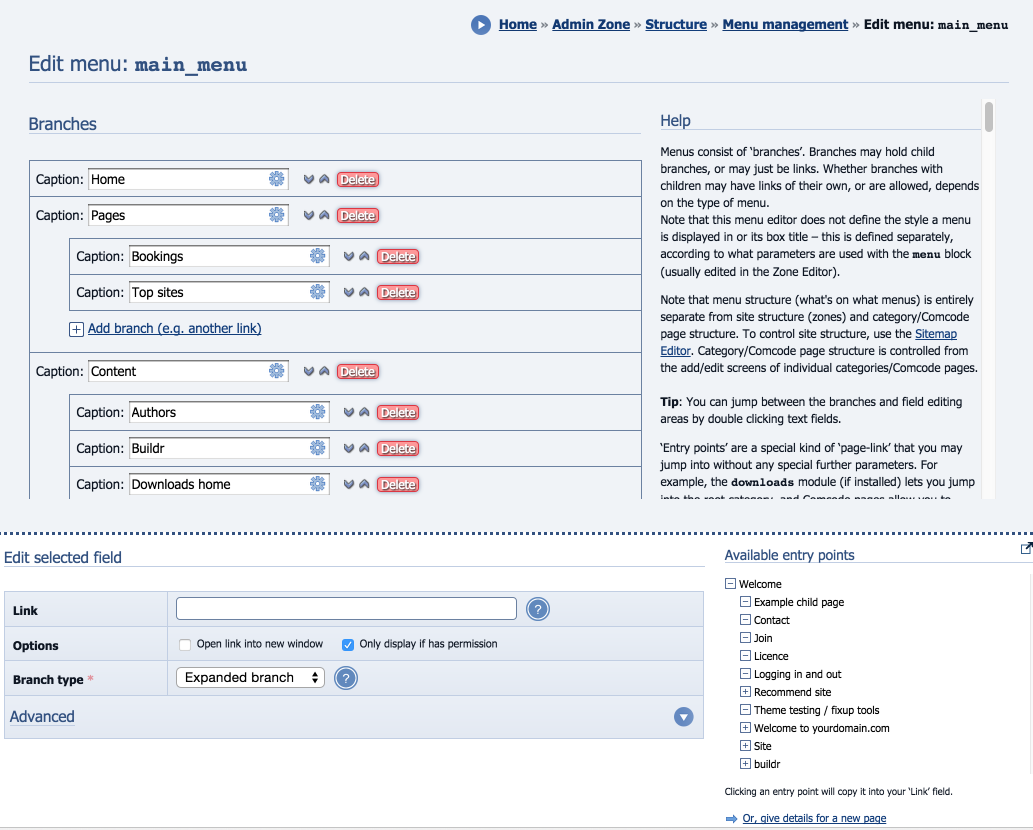
(Click to enlarge)
- the actual menu tree structure
- a form for editing a branch in the tree structure (invisible, until one of the branches is selected)
- a Sitemap tool to find 'entry points' for insertion into the selected branch's URL field
Menus are a tree structure made up of branches, where each branch may be a simple link and/or be a container for more child branches. For a branch with children that branch can be set to be initially expanded or contracted. Note that the expand/contract setting may not do anything; some menu types don't use it, and if you enter a Link then it probably would be displayed auto-expanded anyway (due to clickability on the parent being used to open that link, not expand).
The 'add branch' tool, used in conjunction with the branch-type drop-down list (shown for each branch) allows the full structure to be developed. When you change a branch so it can have children (contracted or expanded branch), you will see that suddenly you may create sub-branches for it.
In the form part of the screen there are the following fields:
- a field for a caption
- a field for a tooltip
- a field for a URL or entry-point
- a field for match-keys – match-keys are a powerful tool for making menus 'context sensitive'.
- a check-box to determine if the link opens in a new window
- a check-box to determine whether the link will be shown only if there is permission to actually view the page (slight efficiency hit, and can't check permissions deeper than the page level)
- options to automatically include Sitemap children (useful if you want to have deep menus that automatically expand as you add new content categories)
You can also delete the menu from a button at the bottom.
Entry points
Entry points are used in the Sitemap tool in the menu editor.Entry points are basically Composr links that are robust to changes in your website and are of the syntax, <zone>:<page>[:<param>=<val>...]. In other words, they all have at least a zone and a page, and may also specify additional parameters: for example, site:downloads:type=add is the entry point to add a download.
Entry points are the subset of all "page-links" that point to specific parts of Composr, rather than some content that you have added. Page-links are described in full in the Composr site structure tutorial.
Don't worry too much about entry point syntax as Composr will automatically convert any local URLs that you paste into the menu editor's URL field.
To copy an entry point to a branch in the menu editor you need to:
- select the caption field of an item in the menu (this will cause an editing form to become available for that menu item)
- click the entry point in the Sitemap tool
Contextual entry-points
If you do not want to hard-code what zone a page is in (perhaps because you might move it in the future), you may specify the entry-point zone as _SEARCH (do a search, which is slightly inefficient) or _SELF (the zone the menu is being displayed in).Match-keys
The menu system can use match-keys for matching against the URL the menu is being viewed from, to determine whether a branch will be shown. If the URL matches against one of the match-keys for a branch, then the branch will be shown, otherwise it won't. Note that if you leave the "Restrict link visibility" field blank, none of this checking happens, and the branch is shown.Match-keys may also be used in other places in Composr, for other kinds of matching purposes.
Match-key s are usually written exactly like page-links, but are instead used only for matching. They do not need to point to anything, unlike page-links which are actually convertible into real URLs.
For an explanation of page-links and entry points, see the Composr site structure tutorial.
The only differences between a page-link and a match-key are:
- Match-keys may use _WILD as the zone or page in order to skip checking against zone/page
- Related to the above, it makes no sense to use _SEARCH or _SELF as the zone/page in a match-key
- While all specified components of a match-key enforce a match, the URL may also have additional parameters and the match-key does not need to state them – i.e. the match-key may specify a subset of the parameters of a URL, broadening the match
- You can comma-separate different match-keys into one match-key
An example match-key list is _WILD:cms_downloads:type=add,_WILD:cms_galleries:type=edit. This would match URLs that were generated from the following page-links (whether these page-links points themselves actually work is irrelevant):
- cms:cms_downloads:type=add
- randomzone:cms_downloads:type=add
- :cms_downloads:type=add:wide=1
- cms:cms_galleries:type=edit
- adminzone:cms_galleries:type=edit:foo=bar
It would not match URLs generated from the following page-links:
- site:cms_galleries:type=add
- randomzone:cms_example
- :cms_downloads:type=edit:wide=1
In the menu editor, multiple match-keys may be entered in the "Restrict link visibility" field with commas to separate them.
Major caveat: caching
The menus default broad menu block caching works against the idea of menus varying by individual URL.If you use match-keys, you must either:
- disable caching on your menu block with cache=0
- disable JavaScript highlighting with javascript_highlighting=0 (which makes the cache bucket work on a page & screen level, which is good enough if your match-keys go no deeper).
For the default menu in the GLOBAL_HTML_WRAP.tpl template that may mean changing:
Code
{$BLOCK,block=menu,param={$CONFIG_OPTION,header_menu_call_string},type={$?,{$MOBILE},mobile,dropdown}}
Code
{$BLOCK,block=menu,param={$CONFIG_OPTION,header_menu_call_string},type={$?,{$MOBILE},mobile,dropdown},cache=0}
Images
Any theme images available with a prefix of icons/ will be available for attachment to menu items, so long as those theme images are defined in the default theme.You can have different versions of the images for different themes, but they must be available on the default theme too.
The simple way to add them if you don't want to use the theme image management to upload them individually is to upload the images to themes/default/images_custom/icons/.
We supply a very large selection by default, including some generic and abstract icons for use on your own pages, if you don't want to create your own icons.
You can also find many icons online using websites such as Find Icons.
Indicating of the current page
Composr will try and calculate the current page and pass this into the branch templates. It does this via the CURRENT and CURRENT_ZONE parameters. CURRENT is only set if every component of the branch page-link matches the current URL (although the current URL can have additional components). CURRENT_ZONE just checks the zone matches.Caveat
In other words, if you have multiple links on a menu under the same page (e.g. to two different galleries), it won't highlight the 'current page' properly when cached because it caches against page-name rather than the whole URL.
To resolve this you will need to turn off the caching for the block by adding a parameter like cache=0 to the block Comcode (the Block construction assistant has a visual option for this, under the Advanced block parameters). Turning off caching will not affect performance much.
The panel/menu relationship
Links to edit a panel page (via the Zone Editor) and to edit menus
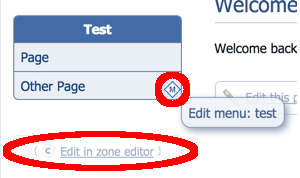
(Click to enlarge)
The default header-menu in Composr 10+ is actually not in a panel at all, it's coded directly into the GLOBAL_HTML_WRAP.tpl template.
Your panel pages by default are just Comcode pages that use the block tag for arrangement of blocks, such as the menu block, menu. Blocks are described in the Using blocks tutorial, but basically, you can use any of the blocks that begin with the name side_ on your panel pages to add dynamic elements, as well as any Comcode. To edit a panel page, go to Admin Zone > Structure > Panel/layout editor (Zone editor).
Menus are not used in any of the default panels, as we use drop-down menus in the main site header. However, most of the menu types are designed for use in panels.
It's flexible (advanced):
- Panel pages need to be Comcode pages if you want to use the Composr menu features, but otherwise there is nothing stopping you constructing panel pages as HTML or modules if you wish to.
- You will very rarely want to put new menus onto anything other than a panel page, although there is nothing stopping you putting them anywhere Comcode or Tempcode is supported.
Permissions
The "Only display if has permission" option can only check zone and page permissions, not category permissions.There is a little trick if you want to apply arbitrary "permission" checks to individual branches. Under the "Advanced" options, you can put Tempcode into the "Restrict link visibility" option.
Here are a couple of examples:
- {$?,{$IS_GUEST},_never_} – Do not show the branch to guests
- {$?,{$NOT,{$IS_ADMIN}},_never_} – Only show the branch to super-administrators
- {$?,{$NOT,{$IS_IN_GROUP,2-3,7}},_never_} – Only show the branch to members within usergroups #2-#3 or usergroup #7
The trick works by only showing the branch on a zone named "_never_" (i.e. this is never going to happen).
Menu auto-generation / chaining (advanced)
There is a way to include the Sitemap directly into menus.This is used:
- for the main sitemap page, which includes the whole Sitemap.
- for the admin menu, which includes stuff just from the Admin Zone and Content Management Zone.
- for the default frontend dropdown menu (although many users will switch this out to a customised menu)
The syntax looks like this:
Code (Text)
adminzone:,include=contents,max_recurse_depth=3,use_page_groupings=1 + cms:,include=wrapper,max_recurse_depth=2,use_page_groupings=1
It consists of:
- a number of sections separated by " + "
- each section starts with a page-link, then has optional options, separated by commas
- options are:
- include – either children or wrapper (this only applies to calls directly made to the menu block). children says to include the children of the page-link, while wrapper says to include the whole branch including the wrapper node.
- max_recurse_depth – if set, this is a number specifying how deep the menu should go
- use_page_groupings – if set to 1, page-groupings (i.e. the hard-coded page organisation, separate to zone structure) will be used
- valid_node_types – a "|" separated list of Sitemap node-types to include (advanced); you can put a minus in front for it to be inverted into a list of invalid node-types
- child_cutoff – the maximum number of children a node may have (if this limit is exceeded no children will be shown for that node)
- consider_secondary_categories – if set to 1, secondary categorisations will be considered, meaning nodes may be duplicated
- consider_validation – if set to 1, non-validated resources will not be shown
- title – forced override for node title
- icon – forced override for node icon (a theme image under icons/24x24)
When you add a new branch to a menu, you can choose to include the Sitemap at the given page-link "over" or "under" that branch. This allows you to chain parts of the Sitemap into your menu (i.e. include a subtree of the Sitemap), giving you the best of both worlds (configurability but also auto-maintenance of displayed categories).
Comcode menus (advanced)
There are two ways to define menus:- Editable menus. These are what we are mostly describing in this tutorial and the usual approach.
- Comcode menus. These are described in the Comcode and the attachment system tutorial. They are created using the Comcode menu tag.
Comcode menus and editable menus are alternatives to each other: both produce the same visual interface, using the same templates, but one is written and laid out in plain-text (Comcode menus) and one is constructed in an editor (editable menus).
There are advantages and disadvantages for both types of menu inside a panel page.

+ Quick to edit for those who prefer to do things in a quick but technical way
+ Unifies the panel pages and menus under a single editing interface
- Complex syntax

+ User friendly
+ Provides menus with greater power (context dependant menus)
+ Provides an interface to find all 'entry points' and easily add them to the menu
- The admin interface is not designed to be accessible for those with disabilities (it requires JavaScript)
Almost all users would best choose editable menus.
Concepts
- Match-key
- Page-link style identifiers used to do pattern matching against URLs
- Editable menu
- A menu created by the menu editor
- Comcode menu
- A menu created via the Comcode 'menu' tag
- Default menu
- A menu created automatically from the Sitemap
- Panel page
- A specially named page that sits on an edge of the main page for all pages in its zone (although a templater could place it anywhere, edges are most common)
- Header-menu
- The menu that exists in the global header by default
See also
- Composr site structure
- Adding standalone pages of content (via Comcode)
- Using blocks
- Comcode and the attachment system
Feedback
Please rate this tutorial:
Have a suggestion? Report an issue on the tracker.