Composr Supplementary: Composr 101 with Arvixe hosting
Written by Jim Davidson, Sponsored by Arvixe hosting
Composr is a very comprehensive Content management system “CMS” That can be set up and used by just about anyone.(This tutorial was written when Composr was still called ocPortal. It has since been partially updated.)
Is Composr right for you?
It's a fantastic CMS that allows you easily build the infrastructure for a vibrant websites including Community sites, straight forward blog based, Portfolio and gallery sites, Information/brochure sites and finally you can even create an online store or a combination of all. If that's your aim then yes Composr is the right product for you.Free Trial
It costs you nothing to try out Composr. You can set up a 30 day demo account with Arvixe webhosting. Why? Well you have 30 days completely free Composr optimised hosting to get used to working with Composr. Any work you do is saved and should you wish to purchase hosting its one click away.Try out Composr with Arvixe
It's very simple to set up your demo.Composr free demo
Note
The username will be used for the name of your demo site.
My username was “ocptutor” therefore my demo site can be found at
http://ocptutor.ocportal.arvixe.com/ (UPDATE: the site is no longer live)
Composr demo site
Obviously we have nothing to look at except the bare bones of your fledgling site. So let's log in and start building your site.
Log in to your site using the default username “admin” and the password you used to set up your trial account.
Composr
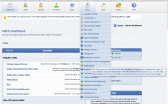
Next click on your profile icon, then the “Admin Zone” link. You will see the Admin Status page which includes a To do list, but for now let's concentrate on the basic site set up.
Composr Admin Zone
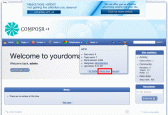
Hover your mouse over the “Setup” link and a drop down menu will appear. Click on the “Setup Wizard” link. From here we can start to piece our site together.
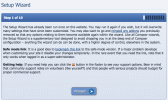
Composr setup wizard step 1
The step by step wizard is broken down into 10 sections so go-ahead and click on the proceed button. Read the splash page of step 2 and proceed onwards again.
Composr setup wizard step 3
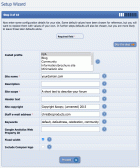
Step 3 as seen above is where the magic starts to happen, you can now start to configure your website. While you can choose to skip this step, I fully recommend that you don't as this section includes setting up meta information which is crucial for search engine optimisation and can be the difference between your site being found on search engines or not.
Install Profile
Install profile options are:- Community
- Blog
- Portfolio/gallery site
- Information/brochure site
- Online store
The form is quite long but take your time. I have listed the form fields below with a brief explanation of what's required.
Site Name
The default here is My Composr – It is most likely that the site name will be the same as your domain name, change accordingly.Description
This appears beside your site name in search engine results for any content pages that don't have their own descriptions/summaries. Make sure that you describe your website as fully as possible in 2 or 3 lines of text.Site Scope
The scope (topic) of your site. This should be a very short phrase that may be embedded within a sentence. For example, a site involving chocolate might choose 'chocolate' as the scope. The software may then use the scope in a larger sentence, for example "We hope that this is the best site for chocolate on the Internet.".Header Text
Appears across all site pages and will most likely be your domain name or a tag line.Site Copyright
What you put on your website you should own, this applies to text and images. Having a site copyright helps protect your content. Just edit the My Composr text again you would probably use your domain name.Staff E-mail Address
While most messages are sent as notifications to the admin account's own e-mail, the staff e-mail address is used in a few places so set something reasonable for this.Keywords
Important for search engine optimisation! Use words that are key to your site content separated by a comma and a space.Google Analytics Web Property ID
This is not in the scope of this tutorial, but for now let it be known that Google provide a free service that allows you to see how many visitors your site gets, what pages were looked at and much, much more information. If you already have Google Analytics then go ahead and enter your web ID here.Fixed-width
By default, the checkbox is checked. For now let's leave it that way.Finally you can chose to show or hide the Composr logo.
Click the Proceed Button
At this point click through to step 9 I would suggest you leave all the default values as they are, either by clicking “Skip this step” or the “Proceed” button. On step 9 you can opt to have a closed site or open it up to the public. By going public, viewers of your pages can see everything warts and all. In my case I want this but you may want to keep the site closed for now. Untick (Uncheck) the checkbox if you want to go public!Step 10
Composr Setup Wizard concluded
The final step offers you four options for now let's click “Go to main website”.
Apart from the text content, nothing on the face of it has changed. However, Composr has created the basis for my community website as we can see if I click on “Social”
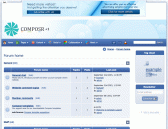
Viewing our forum
Composr has created the following for us:
- Forums
- Rules page
- Member list
- User groups
- Chat lobby
- Point Store
- Personal profiles
It's easy to see from this initial install just how powerful and flexible Composr is, however the initial install includes so much more than listed above and I will work my way through these in other tutorials.
Feedback
Please rate this tutorial:
Have a suggestion? Report an issue on the tracker.


