
Composr Supplementary: Sending E-mail Newsletters in Composr Part 2
Written by Steve Jarvis, Sponsored by Arvixe hosting
Setting content for a periodic newsletter in Composr (2)
(Click to enlarge)
Setting content for a periodic newsletter in Composr (1)
(Click to enlarge)
Sending an auto update content summary e-mail
The second type of e-mail newsletter in Composr is an automatic update which will pull in content or links to content which you have added to your Composr website. First you will need to return to the manage newsletter screen of your Admin Zone and choose the "Manage automatic issues" option.This type of newsletter is different to the one above because it pulls in content from your website and works really well as a general update e-mail. It can be a quick way to update your members of new news and items which they may have missed.
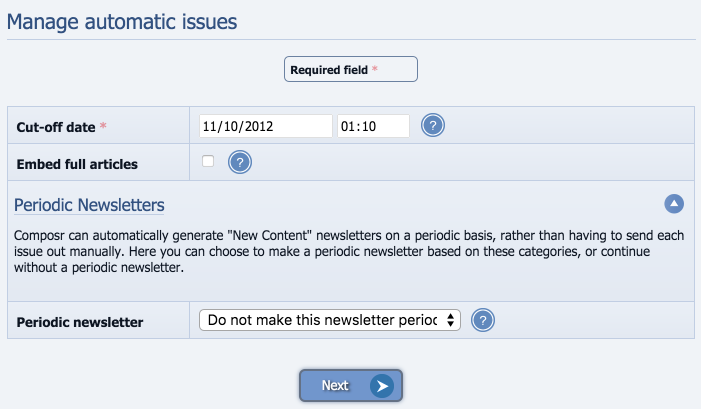
The first stage of the process is the form (image 1) and begins with setting a cut-off date. This will allow you to pick a date which you want to include content since. The date you input will determine when the e-mail will pull content from. The next option allows you to choose whether to include full articles or just links to the content. If you have a lot of content I recommend not using this or the e-mail will be very long!
The last option on this screen allows you to choose whether this will be a periodic e-mail or a one-off.
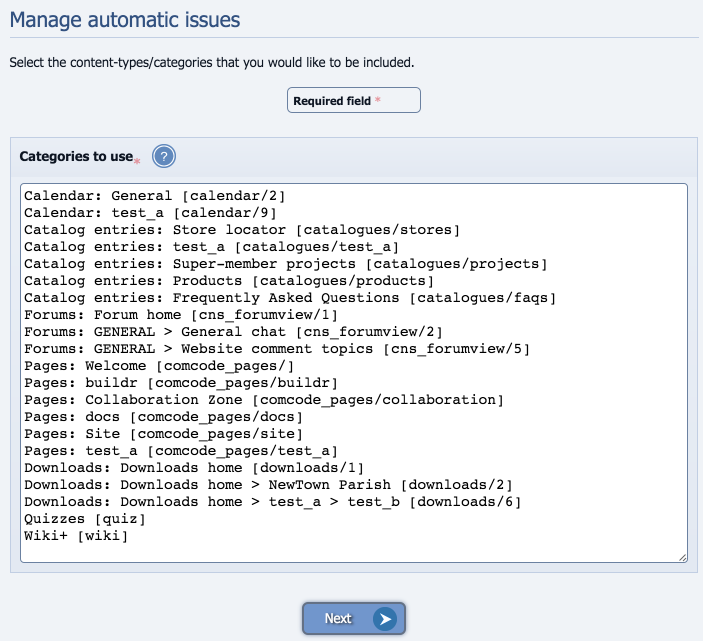
After clicking 'Next' the next stage is where you will choose the sections of your site which you want to include content from (image 2). You can select as many or as few of these as you like but please bear in mind that the more you select the longer your e-mail will be for your users to read. I believe it is better to only select a few key sections to help keep the focus of the content you want to share.
Once you click 'Next' you will be taken to a form similar to the form in part 1 of this tutorial. The big difference is the content section will be pre-populated with the content which you selected earlier. If you have chosen many different sections you will be able to see how long the e-mail is. This part gives you the opportunity to edit or remove content from the e-mail, write a custom introduction or make any other changes.
Fill in the rest of the form as you would have for part 1 and then click Preview. As before, the preview will give you both HTML and plain text versions of your e-mail. If everything is ok click 'Proceed' to send your e-mail.
There are benefits to both types of these e-mails and at times you may choose to make use of both types. On occasions you may just want to send a quick update to your site members informing them of some news and at other times you may want to choose to send them a general update.
Feedback
Please rate this tutorial:

Have a suggestion? Report an issue on the tracker.